
Manage the local Administrators group on AzureAD joined devices with Endpoint Manager/Intune
There are multiple methods of managing the local Administrators group of a device with Endpoint Manager/Intune. In this blog, we will explore each method and explain how it works.
Microsoft recently announced native LAPS support for Windows. LAPS will be fully funtional for Azure Active Directory joined devices. More information here.
Azure AD Roles
There are 2 Azure AD roles which give you local administrator rights to every AzureAD joined device in your tenant.
These are:
- Global Administrator
- Azure AD joined device local administrator
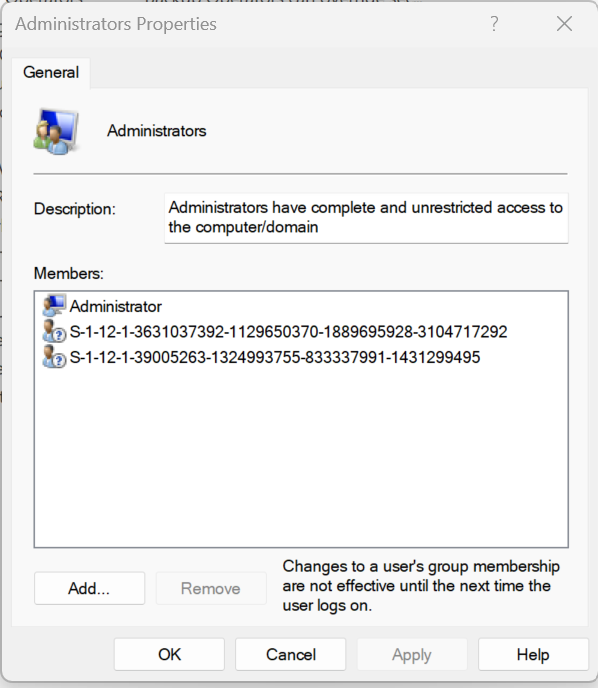
We can prove this. If you look at the local administrator group on a newly Azure AD joined device, you will see there are 2 SIDs listed.
To confirm what these SIDs are in Azure, first we need to convert the SID to an Object ID, then we can use the GraphAPI to query the ObjectID, which will give us the name of the role it’s associated with.
To convert the SID to an ObjectID, we can use the below script, which I’ve adapted from this blog.
$sid = "S-1-12-1-XXXXXXXXXX-XXXXXXXXXX-XXXXXXXXXX-XXXXXXXXXX"

$text = $sid.Replace('S-1-12-1-', '')
$array = [UInt32[]]$text.Split('-')

$bytes = New-Object 'Byte[]' 16
[Buffer]::BlockCopy($array, 0, $bytes, 0, 16)
[Guid]$guid = $bytes
return $guid

Write-Output $guid
Running the script converts the SIDs to the ObjectIDs listed below:
| SID | ObjectID |
|---|---|
| S-1-12-1-3631037392-1129650370-1889695928-310471729 | d86d3bd0-18c2-4355-b878-a270ec390eb9 |
| S-1-12-1-39005263-1324993755-833337991-1431299495 | 02532c4f-ccdb-4ef9-87ba-ab31a7e54f55 |
We can now run the Get-AzureADDirectoryRole powershell command to return a list of Azure AD directory roles and their associated ObjectIDs.
# Import the AzureAD module if youve not used it before
Import-Module AzureAD
Connect-AzureAD
Get-AzureADDirectoryRole
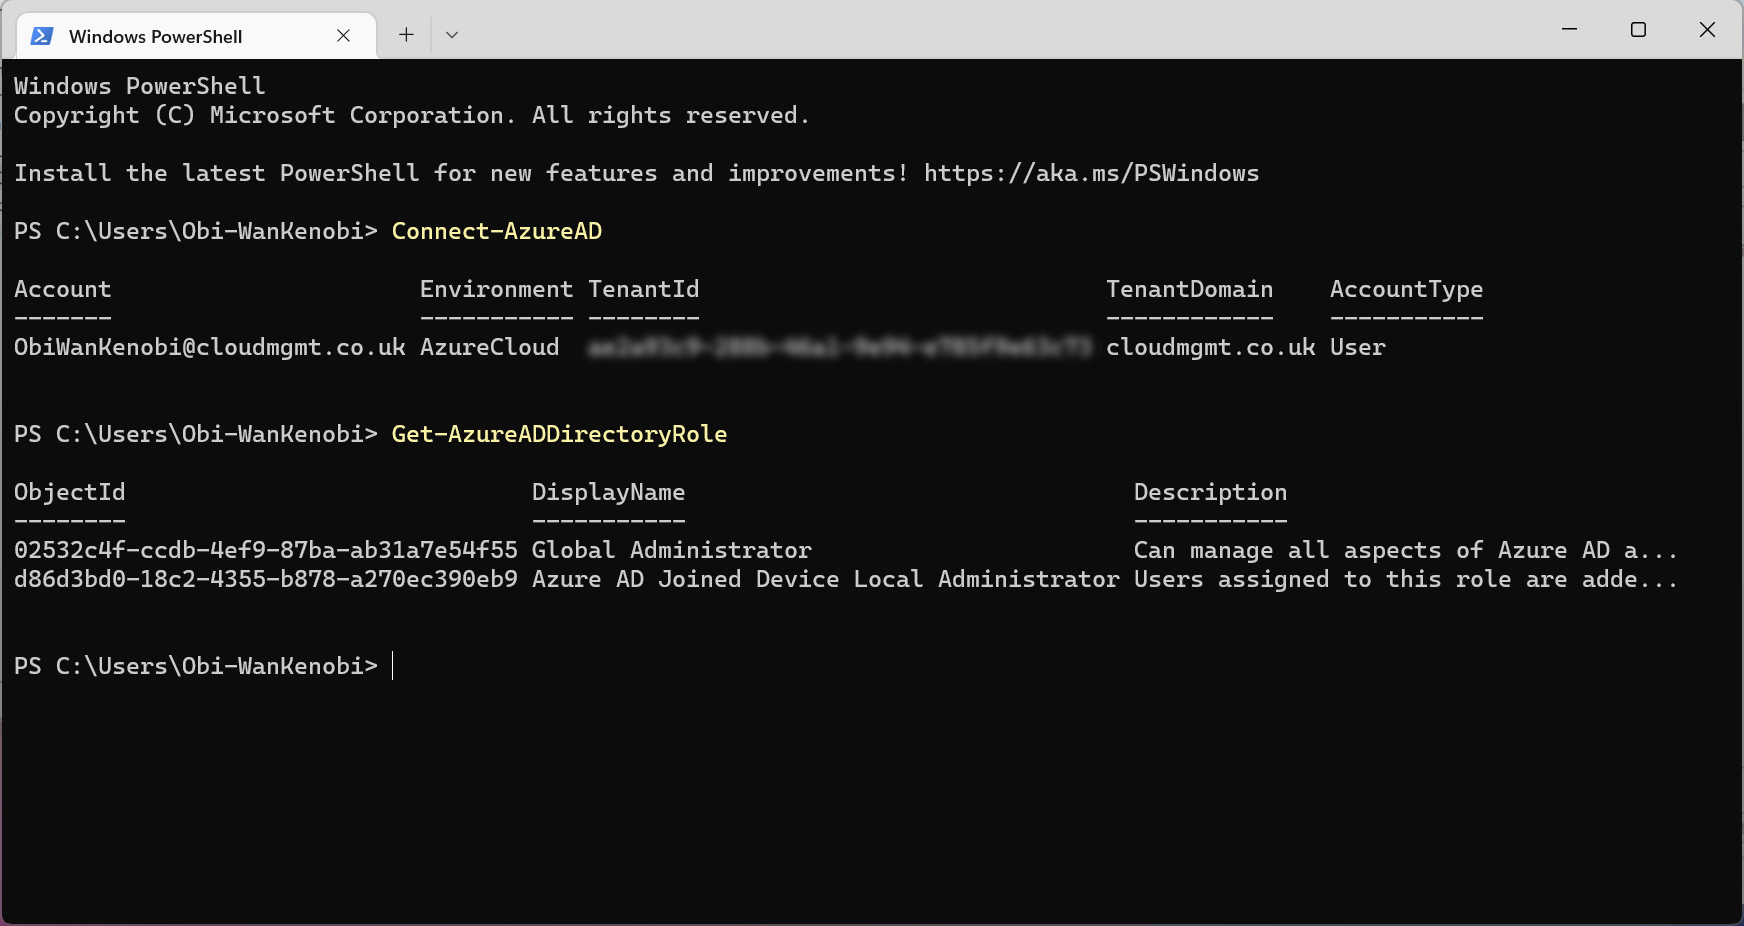
Looking at the output, we can see that the ObjectID for the “Global Administrator” and “Azure AD Joined Device Local Administrator” roles, match the ObjectIDs we generated from the SIDs in the local administrator group on the device.
This means every user in these groups will have local administrator rights on the device. As these roles are automatically assigned to all Azure AD joined devices by default, every user in these groups will have admin rights to every Azure AD joined device in your tenant.
Add a custom Azure AD Group and/or individual users
If you want to assign your own groups and/or users to the local administrator group on devices, you can use the Local Users and Groups Policy CSP via a custom OMA-URI.
Before we get started, make sure you already have an AzureAD group which you want to add to the local administrator group. In my case, I’ve created a group called Custom Local Administrators.
Identify the SID
We first need to identify the SID of the group which we want to use. To do this, we can run the below script that I’ve created.
<#
.SYNOPSIS
Gets the SID of an AzureAD group based on the name.

.DESCRIPTION
Retireves the ObjectID of the requested Azure AD group and converts it to a SID.
Author: Tristan Tyson (tech.tristantyson.com)

.PARAMETER groupName
The name of the AzureAD group you want to know the SID of
#>

Param(
    [Parameter(Mandatory=$true, ValueFromPipeline=$true)] [string[]] $groupName
)

# Import the AzureAD module if youve not used it before
$module = Import-Module AzureAD -PassThru -ErrorAction Ignore
            if (-not $module)
            {
                Write-Host "Installing module AzureAD"
                Install-Module AzureAD -Force
            }

# Connect to your Azure tenant
$aadId = Connect-AzureAD
Write-Host "Connected to Azure AD tenant $($aadId.TenantId)"

# Get the group ObjectID
$ObjectId = (Get-AzureADGroup -Filter "DisplayName eq '$groupName'").objectid
Write-Host "Getting ObjectID"

# Convert the ObjectID to SID
Write-Host "Converting ObjectID to SID"
$bytes = [Guid]::Parse($ObjectId).ToByteArray()
$array = New-Object 'UInt32[]' 4
[Buffer]::BlockCopy($bytes, 0, $array, 0, 16)
$sid = "S-1-12-1-$array".Replace(' ', '-')
Write-Host ""

#Output SID
write-host "SID:"
$sid
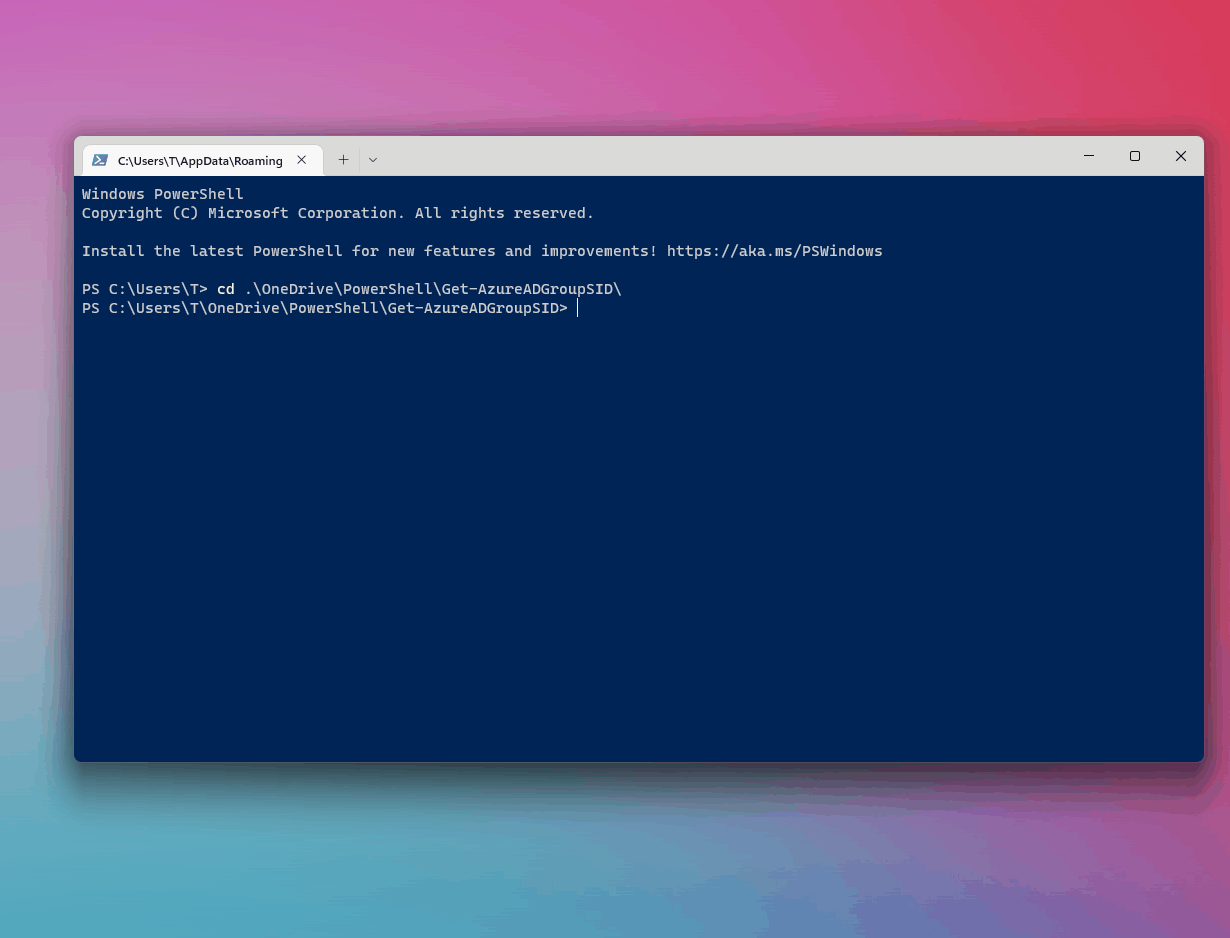
Save the script and pass through the group name with the -groupName parameter.
.\get-azureadgroupsid.ps1 -groupName "Custom Local Administrators"
Create the policy
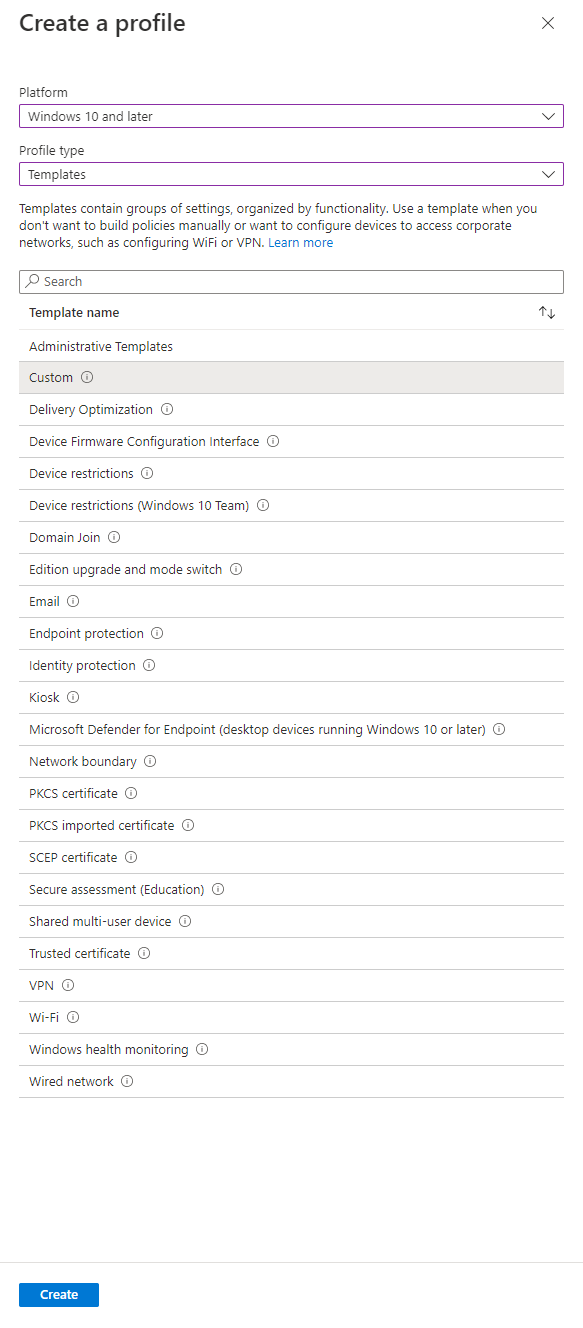
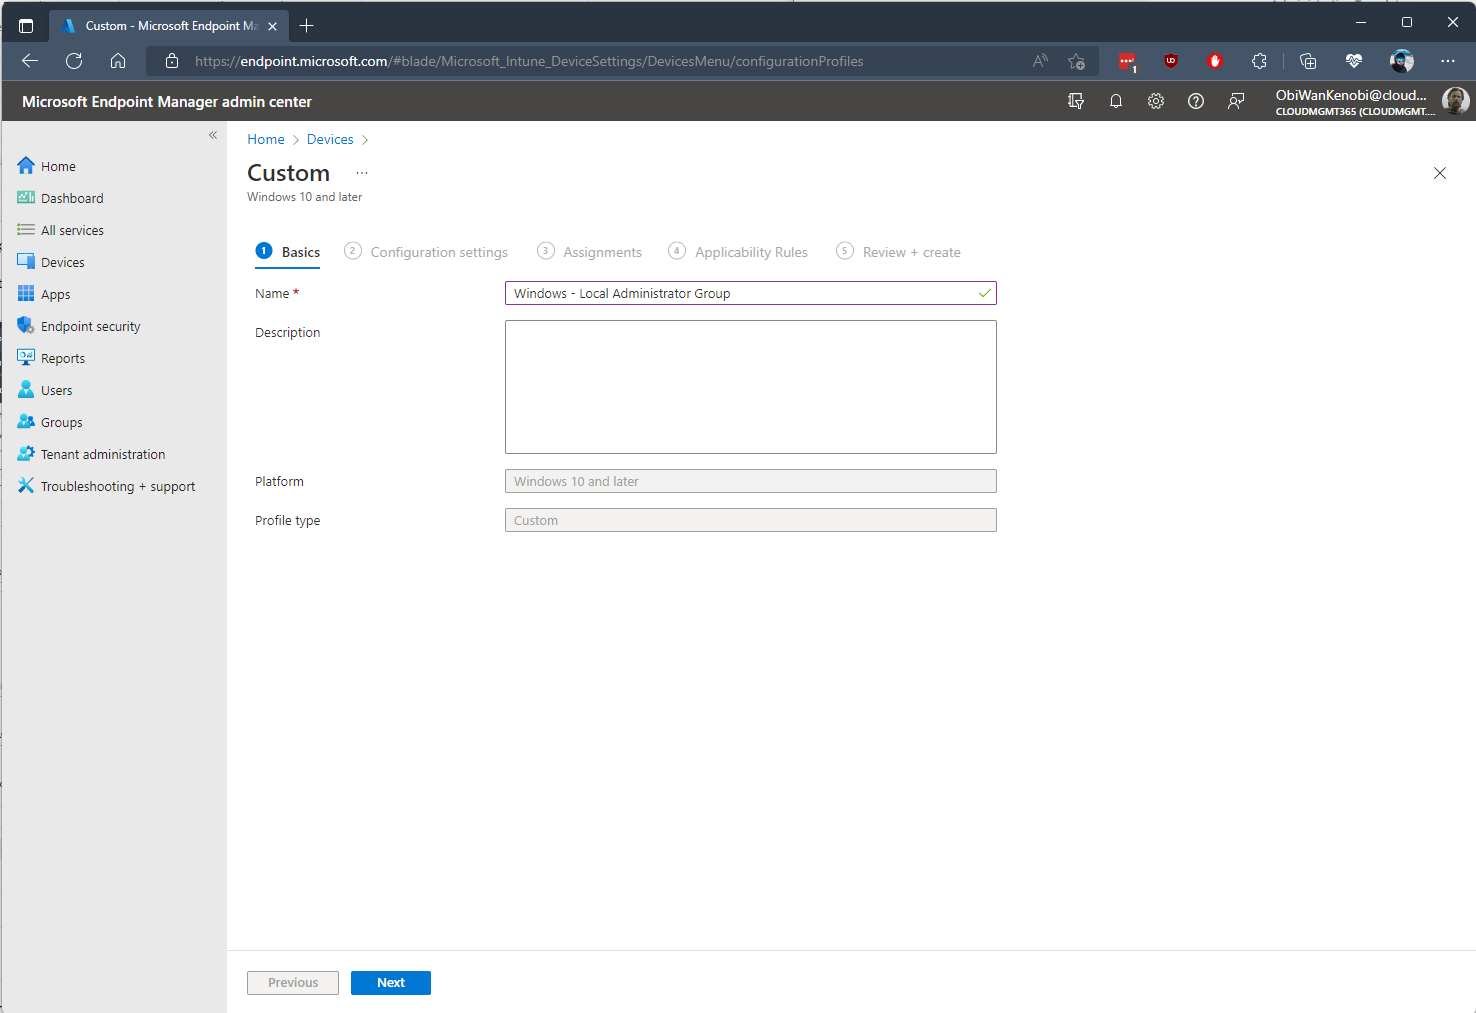
Now we have the SID, we an create the custom OMA-URI policy. Go to the Endpoint Manager portal and select Devices, Configuration profiles, then Create profile.
On the Create a profile page, for Platform select Windows 10 and later, for Profile type select Templates. Under the Template name list select Custom, then Create.
Enter a name for the profile and select Next.
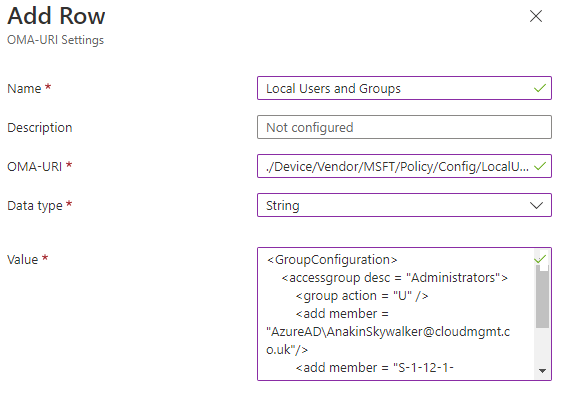
On the Configuration settings page select Add. Give the row a name, then for OMA-URL enter ./Device/Vendor/MSFT/Policy/Config/LocalUsersAndGroups/Configure, and for Data type enter String.
For the Value we are going to use the below policy definition XML:
<GroupConfiguration>
    <accessgroup desc = "Administrators">
        <group action = "U" />
        <add member = "AzureAD\AnakinSkywalker@cloudmgmt.co.uk"/>
        <add member = "S-1-12-1-368878612-1288782540-3402422455-4238781176"/>
    </accessgroup>
</GroupConfiguration>
This policy adds 2 members to the local admin group. The Custom Local Adminstrators group ass well as a single AzureAD user with the UPN of AnakinSkywalker@cloudmgmt.co.uk.
Select Save, then Next. Assign the policy to a device group and Next through the remaining options and Save the policy.
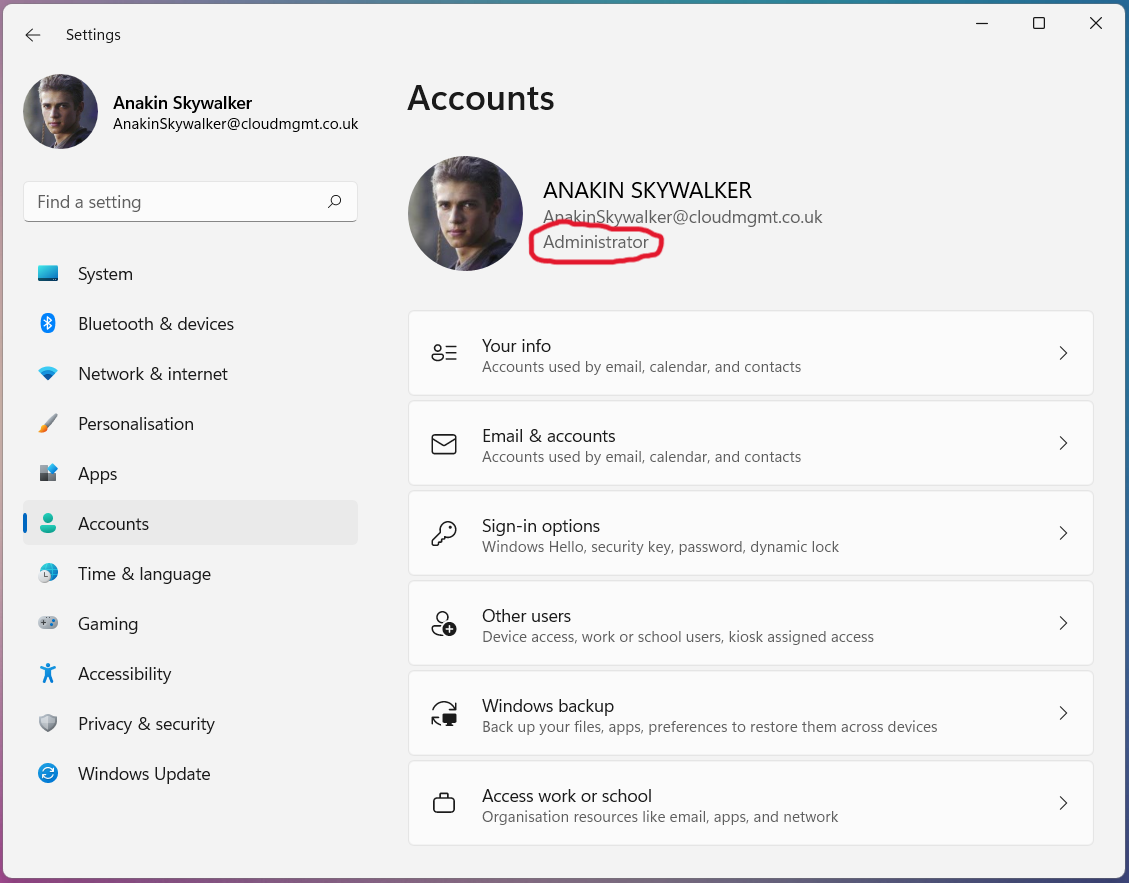
Outcome
After deploying the policy, and after a fresh logon, we can see that the specified user account has changed to become an administrative user.
Before:

After:
Understand the policy definition XML
The policy definition consists of 4 parts:
accessgroup desc - Specifies the name or SID of the local group you want to configure. In this case, we specified the Administrator group, but you can specify any local group, such as Remote Desktop Users.
group action - Specifies the action to take on the local group, either Update or Restrict (represented by U and R). Update keeps the current group membership intact and adds or removes members. Restrict replaces the all current members with what is specified in the policy.
add member - Specifies the SID or name (UPN) of the member you want to add to the group.
remove member - Specifies the SID or name (UPN) of the member you want to remove from the group.
<GroupConfiguration>
    <accessgroup desc = "">
        <group action = ""/>
            <add member = ""/>
            <remove member = ""/>
    </accessgroup>
</GroupConfiguration>
Device Enrolment
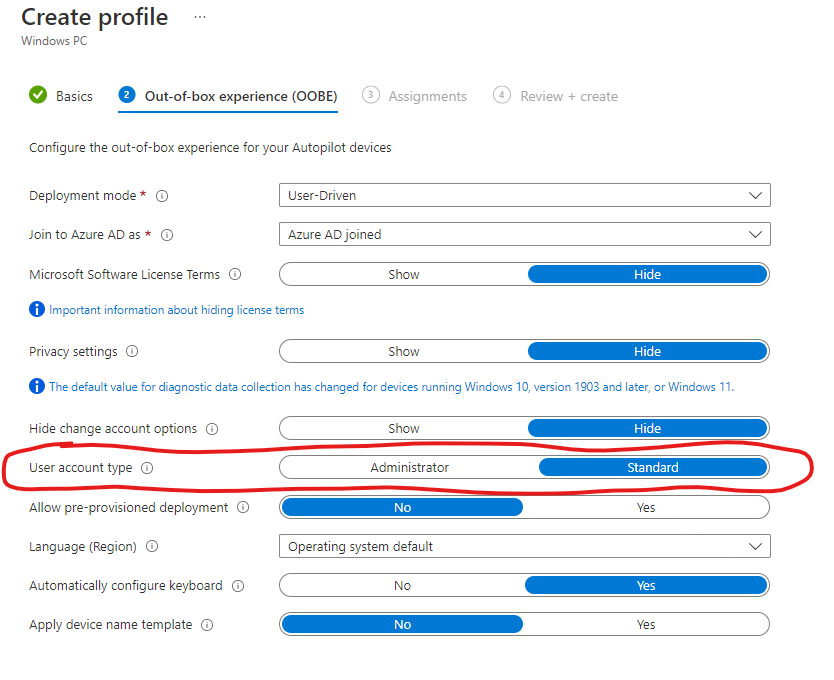
By default, the user performing the Azure AD join is added to the local administrator group on the device. To avoid this you can use Autopilot or Bulk enrolment to Azure AD join your devices.
Autopilot - When creating your Autopilot deployment profile you have the option to set the User account type to either Administrator or Standard.
Bulk enrolment - The Azure AD join is performed in the context of an auto-created user. Users signing in after a device has been joined, aren’t added to the administrators group.
Manually elevate a single user on a single device
You can manually elevate a user on a single device. The person performing this needs to already be an administrator, so this method is best suited to elevating users on an ad-hoc basis.
On the required device, navigate to Settings, Accounts, Other users. Select Add a work or school user, enter the user’s UPN under User account and select Administrator under Account type.
You can also elevate users from an elevated command prompt with the command net localgroup administrators /add "AzureAD\UserUpn”.