Add a Custom Domain Name to Azure Active Directory
Why add a custom domain name?
When you first set up your Azure account, your Azure Active Directory tenant comes with an initial domain name: domainname.onmicrosoft.com. You are free to use this domain name, but it means that your account usernames become quite long, such as username.domainname.onmicrosoft.com.
To better represent your organisation, you can add a custom domain name. This allows you to create user names that are familiar to your users, such as name@organisation.com.
Prerequisites
Before you begin, you need to have registered a domain with an ICANN-Accredited registrar.
I use Google Domains, but I’ve also used Ionos before.
Add your custom domain name to Azure AD
Once you have acquired the domain which you wish to use, you can add your custom domain name.
- Sign in to the Azure portal with an account that is the Global administrator for the directory.
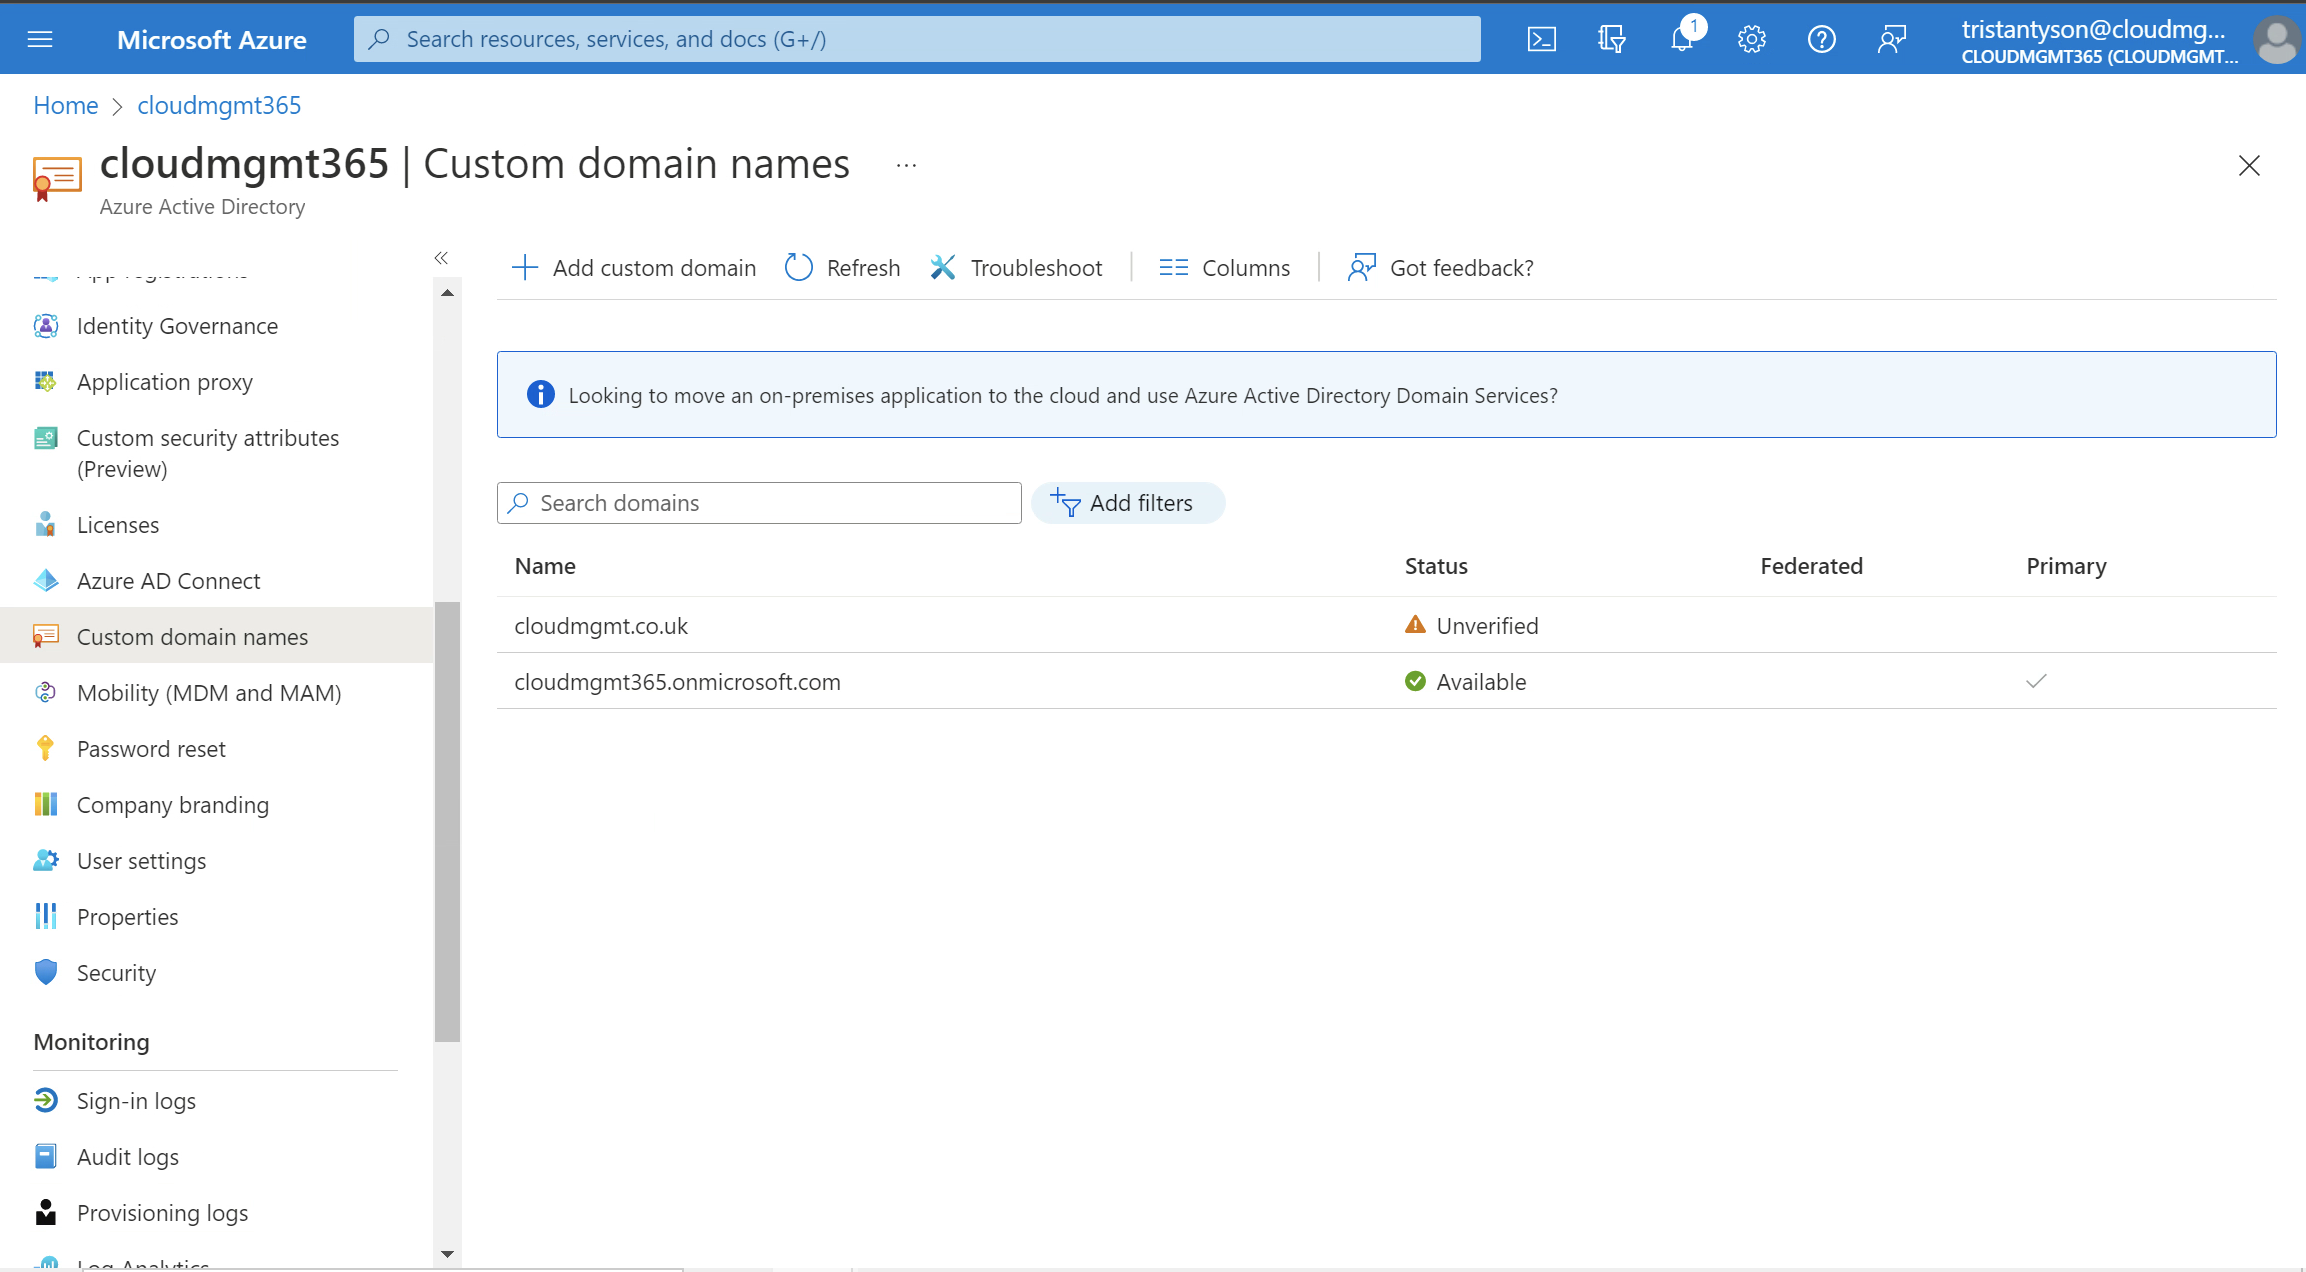
- Search for and select Azure Active Directory from any page. Then under Manage, select Custom domain names.
-
From the top of the page select Add custom domain.
-
In the Custom domain name field, enter your registered domain name. In this example, cloudmgmt.co.uk. Select Add domain.
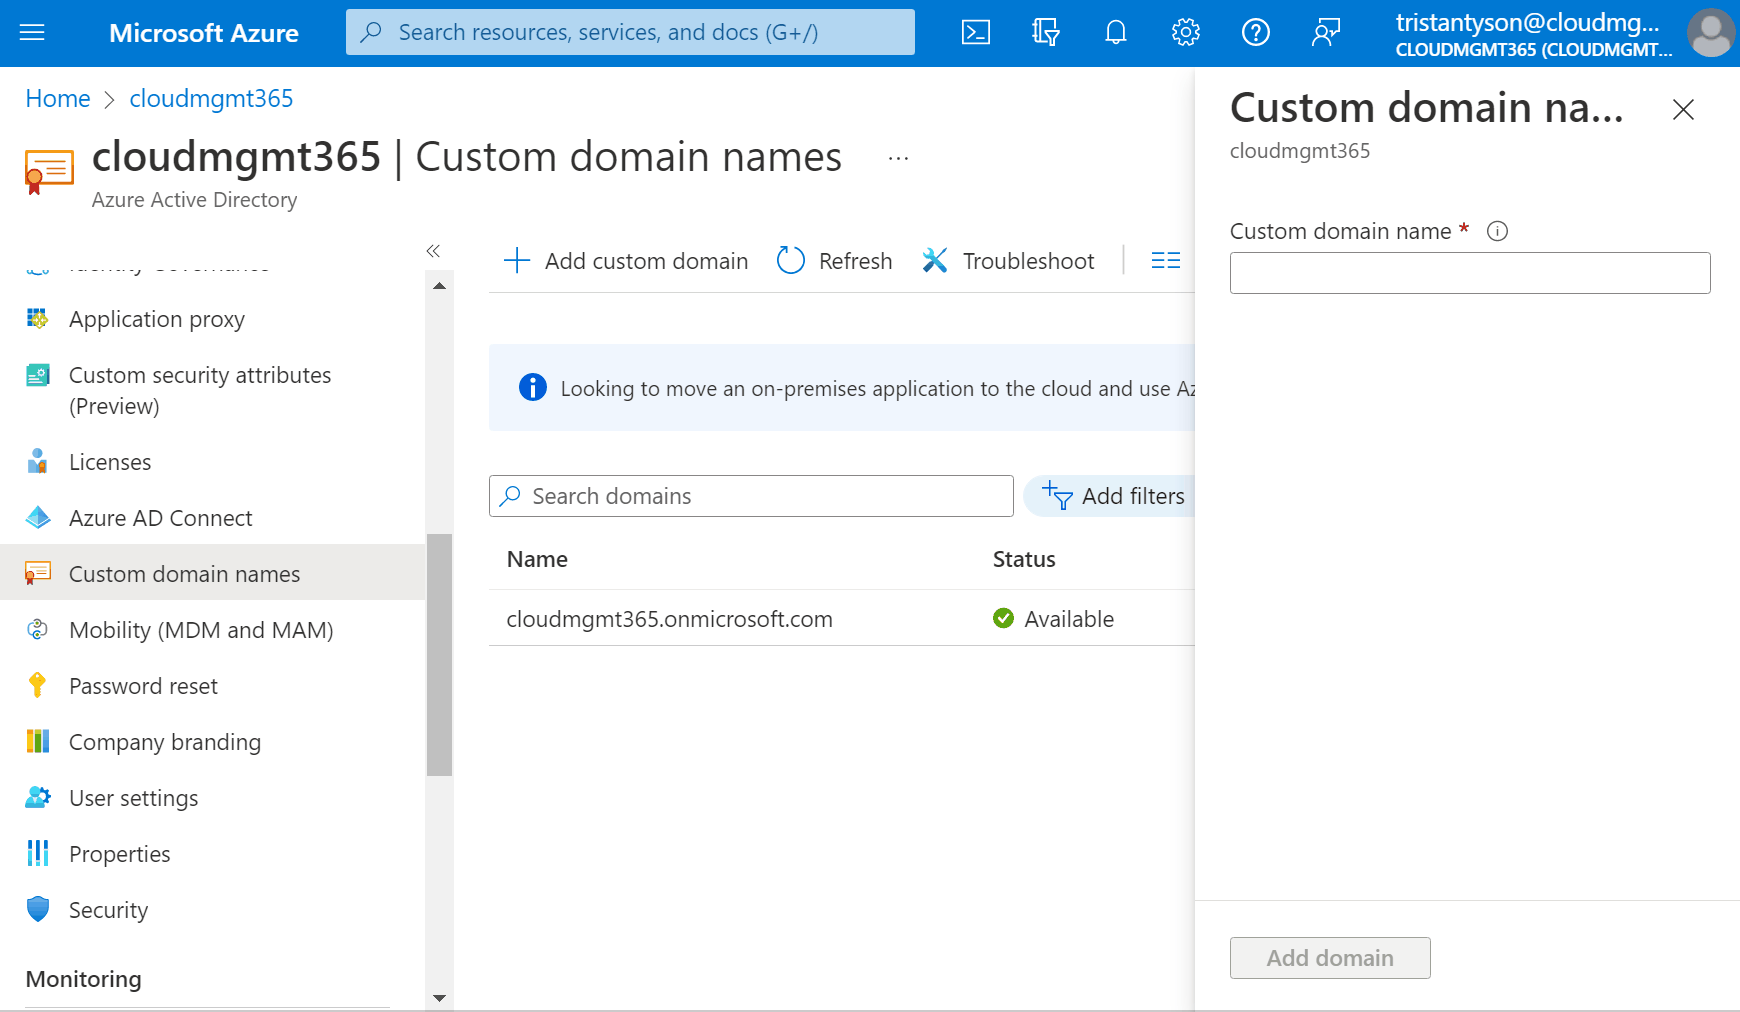
You must use a top level domain extension for this to work properly.
- The domain is now added but unverified. To verify the domain you will need to configure DNS with a TXT record, via the domain registrar, where you purchased your domain.
Add your DNS information to the domain registrar
Creating a TXT record with your domain registrar verifies ownership of your domain name.
- Go to your domain registrar.
-
Create a new TXT record for your domain based on the DNS information provided when you added your custom domain to Azure Active Directory.
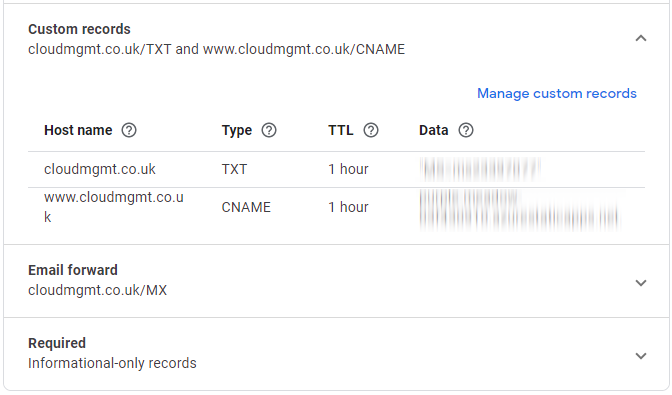
- Wait at least an hour for the DNS updates to propagate.
Verify your custom domain in Azure
The propagation from your domain registrar to Azure AD can be instantaneous or it can take a few days.
To verify your custom domain name, follow these steps:
- Sign in to the Azure portal using an account which is a Global administrator for the directory.
- Search for and select Azure Active Directory from any page. Then under Manage, select Custom domain names.
-
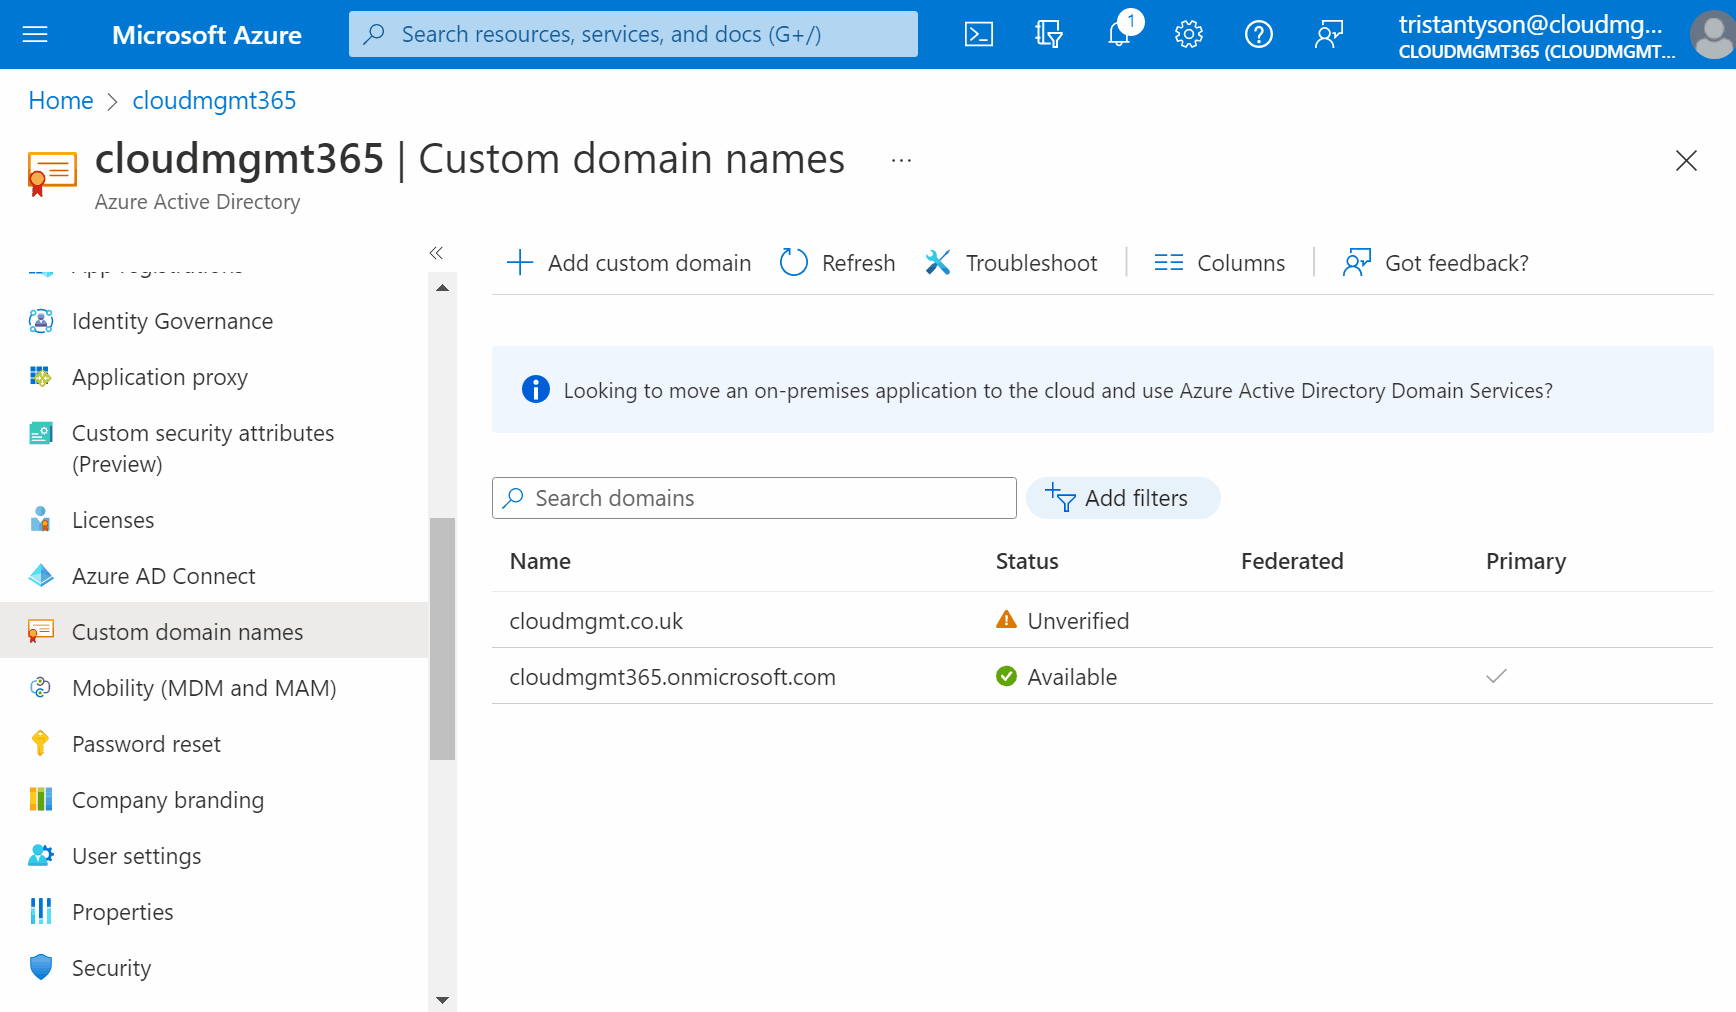
In Custom domain names, you will see your newly added domain name. It should appear showing a status of unverified. Select the unverified custom domain.
-
On the domain page, select the Verify.
-
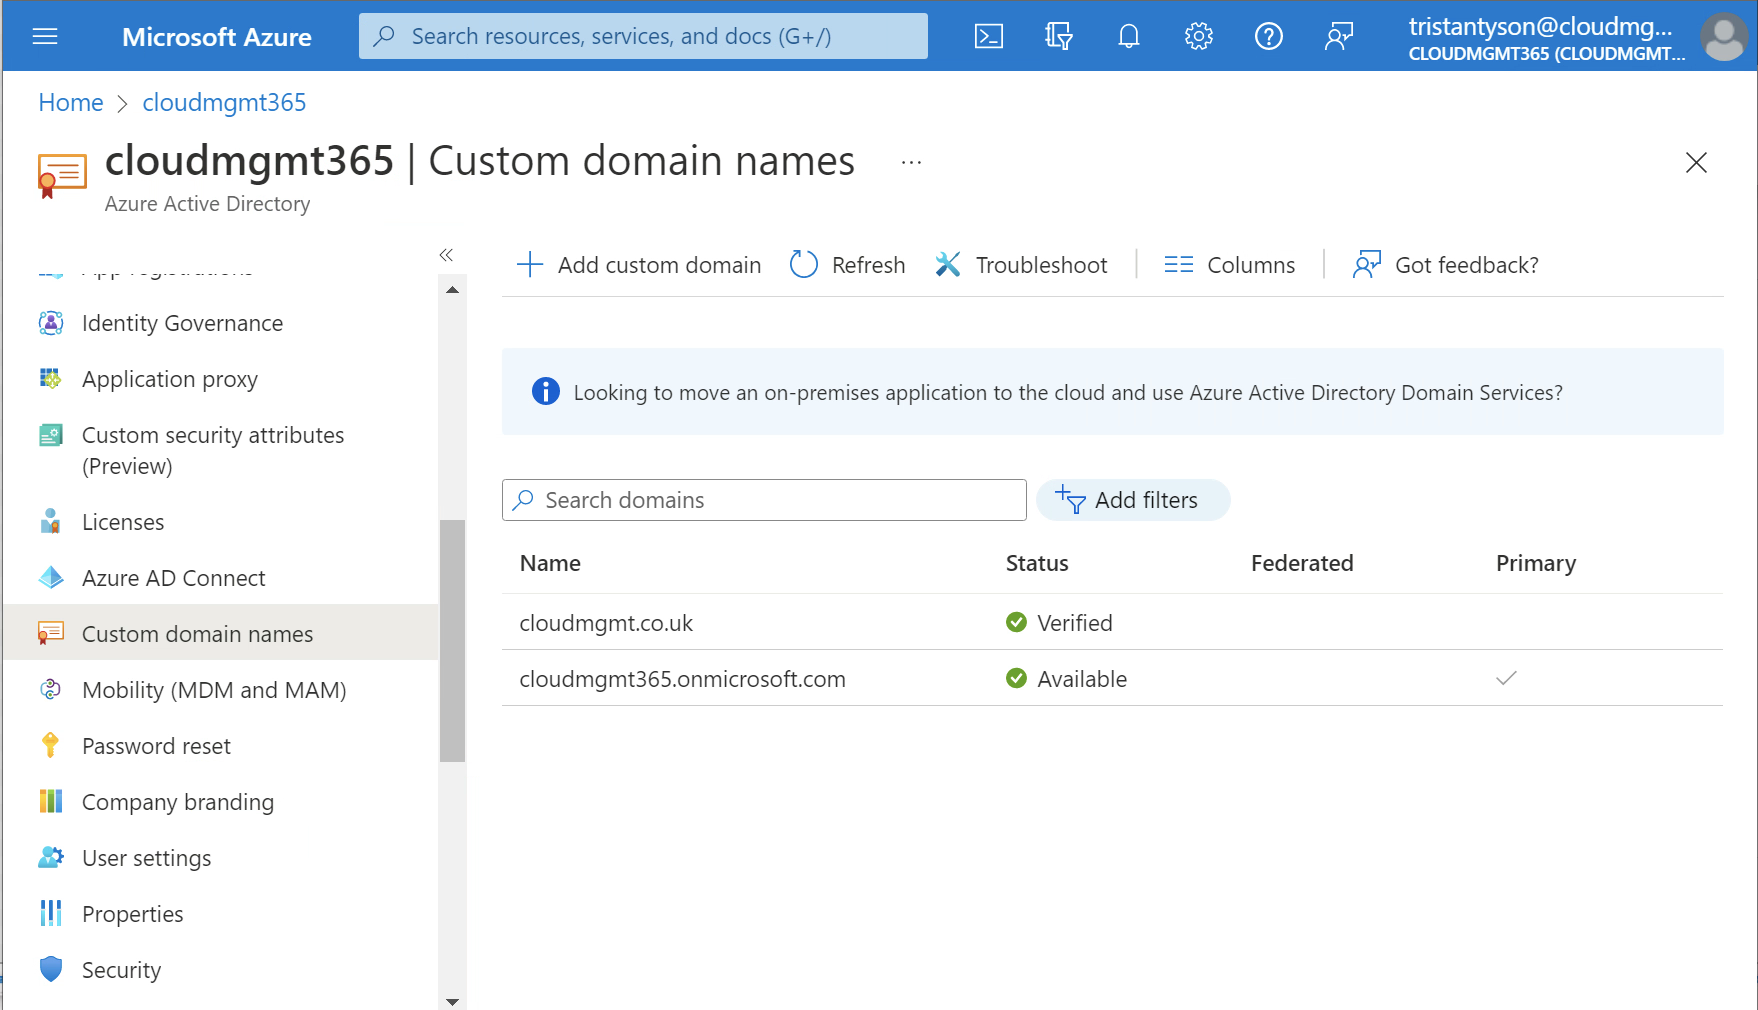
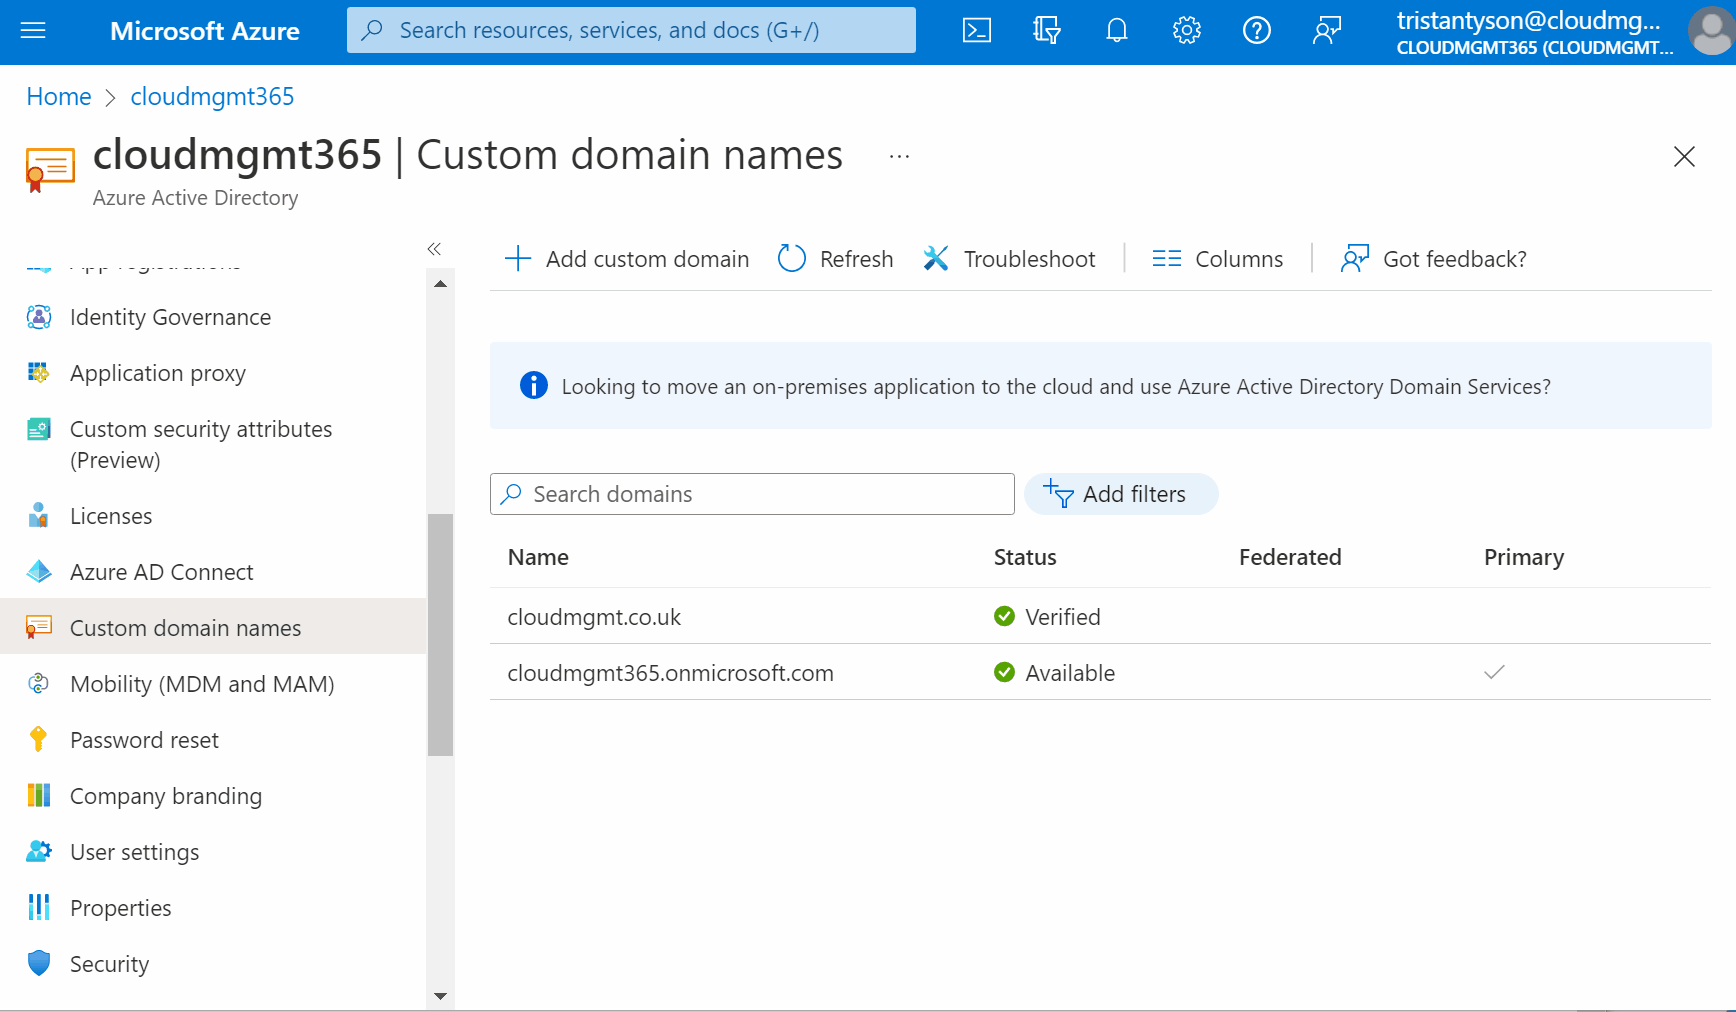
Navigate back to the Custom domain names page and you will see your custom domain now has a status of verified.
-
To make the custom domain your primary domain, select the custom domain, and select Make primary.
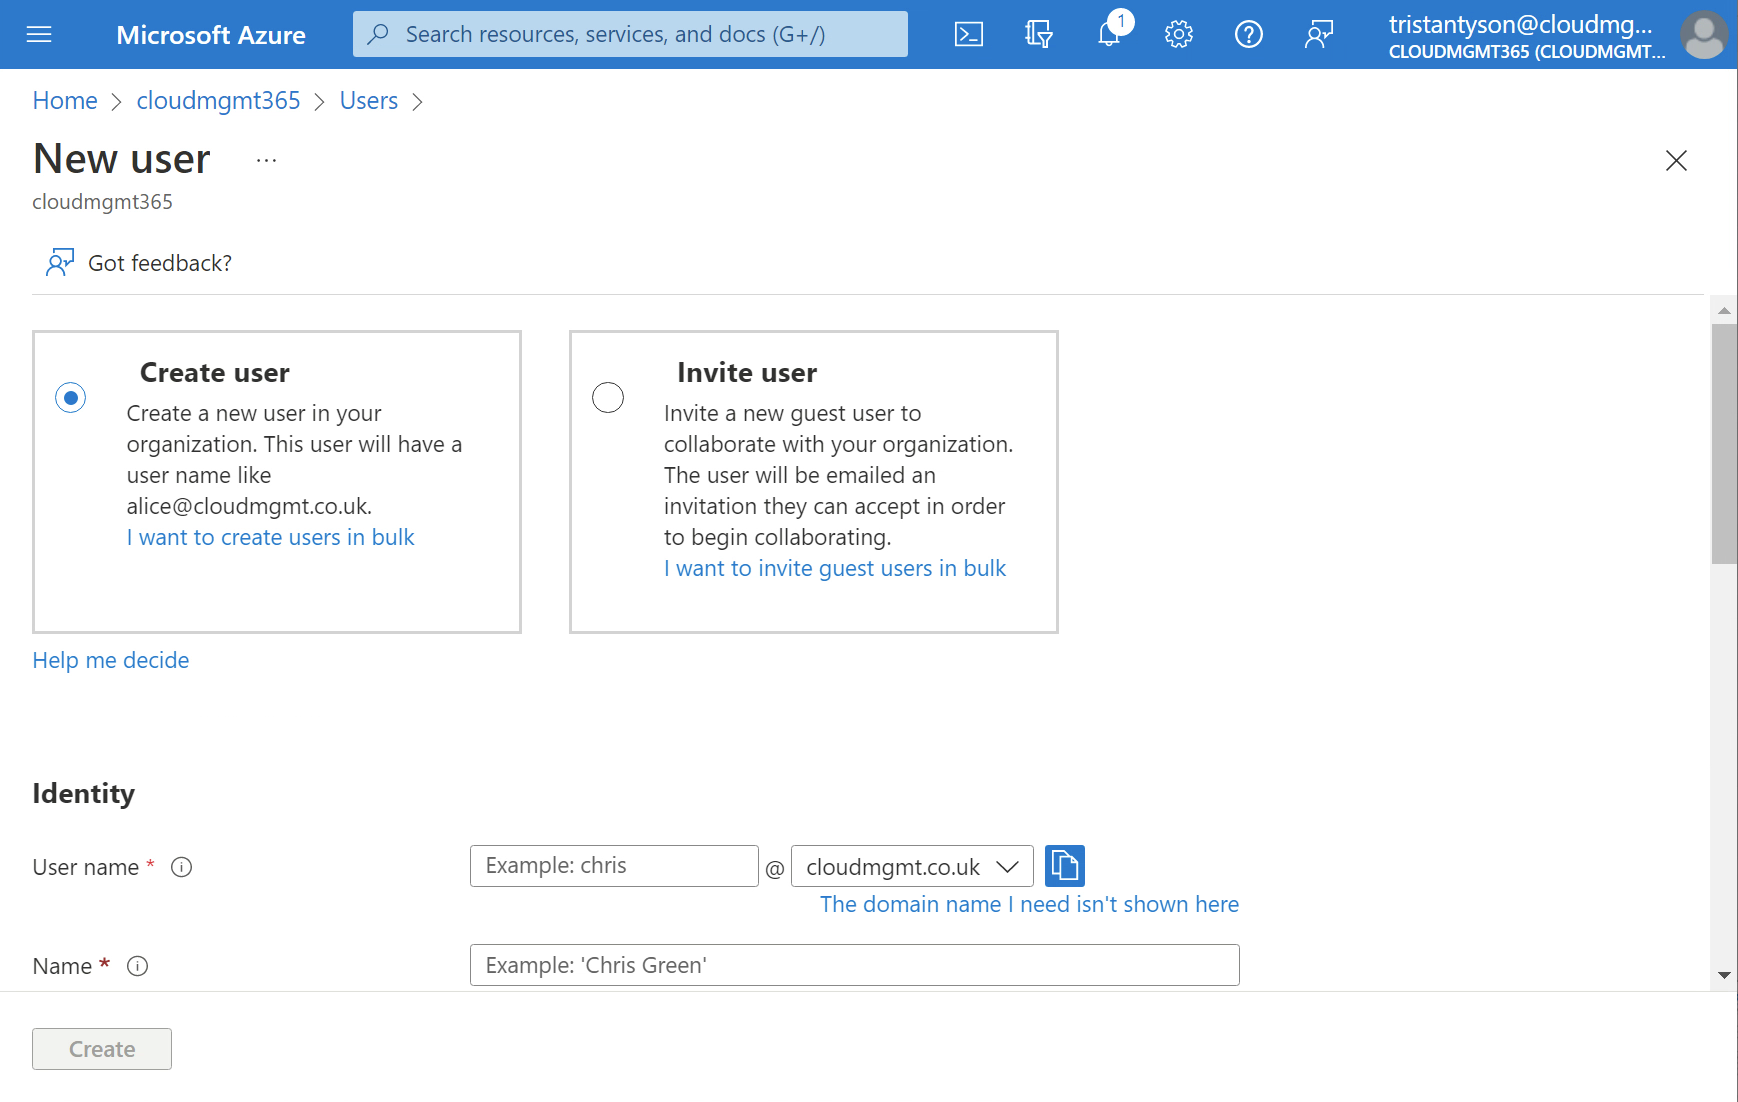
Creating a new user
Your custom domain name is now set up. When you go to create a new user in Azure Active Directory, your newly added domain will be available to select as a domain.