Getting started with Jekyll Static Site Generator
What is Jekyll
Jekyll is a static site generator. Jekyll takes all the elements of a web page and generates a site for you, leaving you to concentrate on the content rather than the coding.
Jekyll is a “blog focused” framework, meanings its great for producing blog sites straight out of the box. All content is written using markdown and all customisation is done via templates and themes, so no HTML/CSS is needed.
Install Ruby (Windows)
Download the latest Ruby distribution available.
Next through the installer as below.
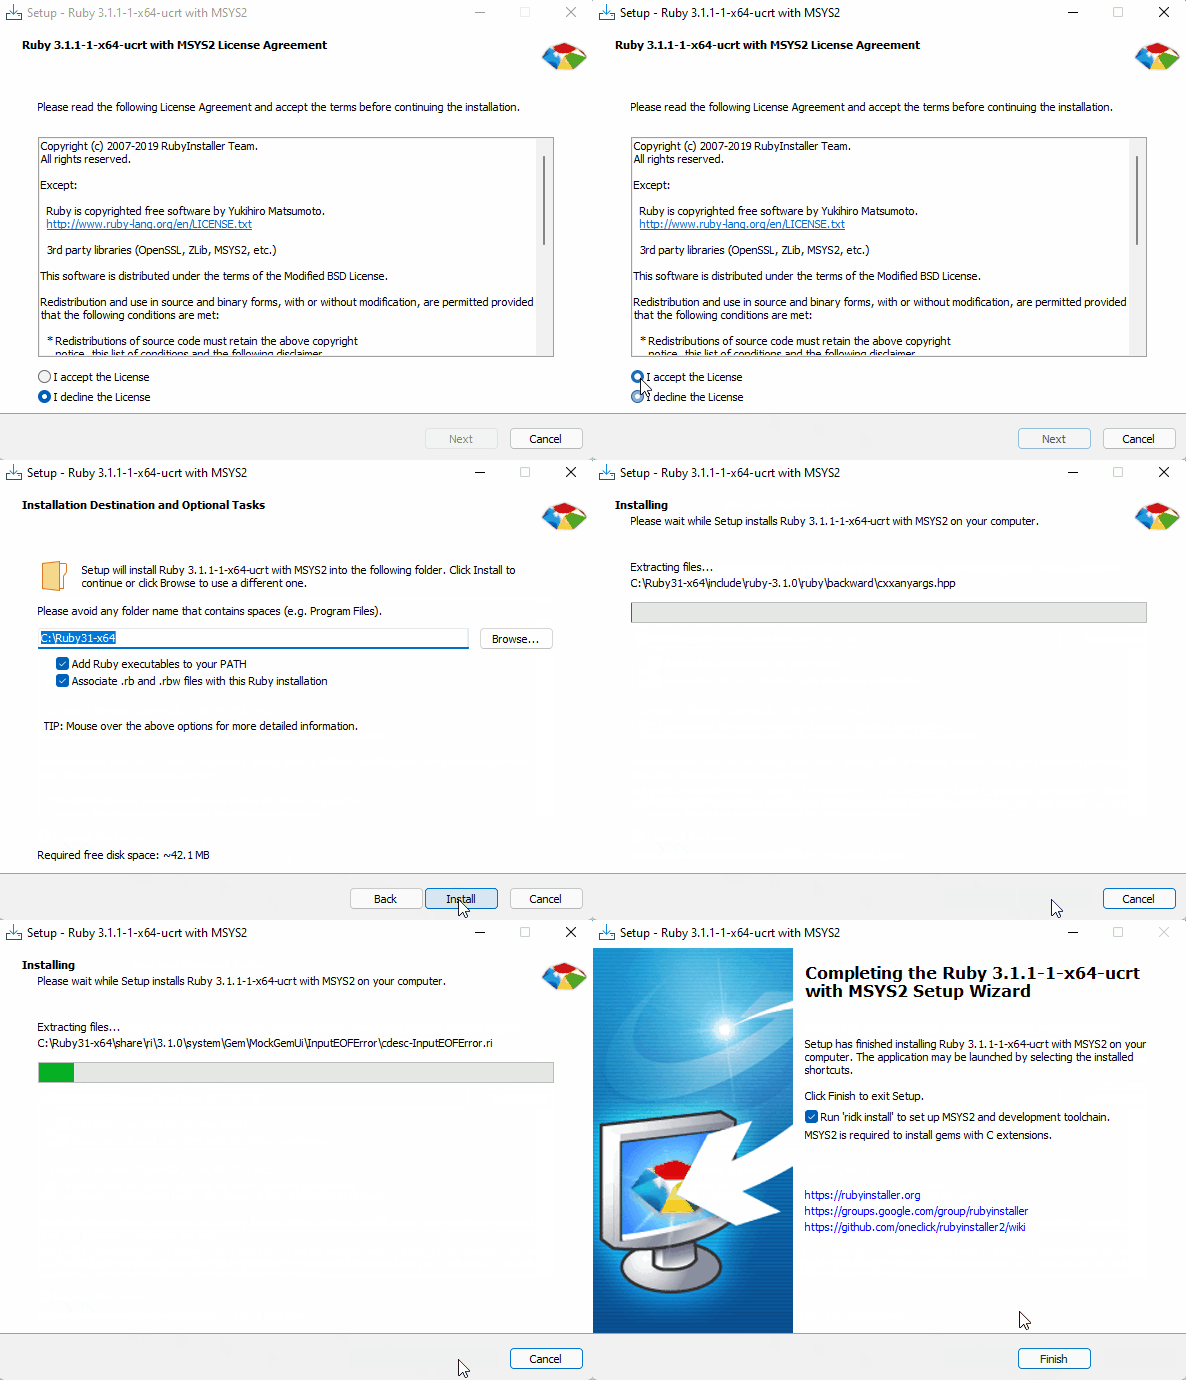
Once the installer has finished, leave the “run ridk install to set up MSYS2” tick box ticked and select finish.
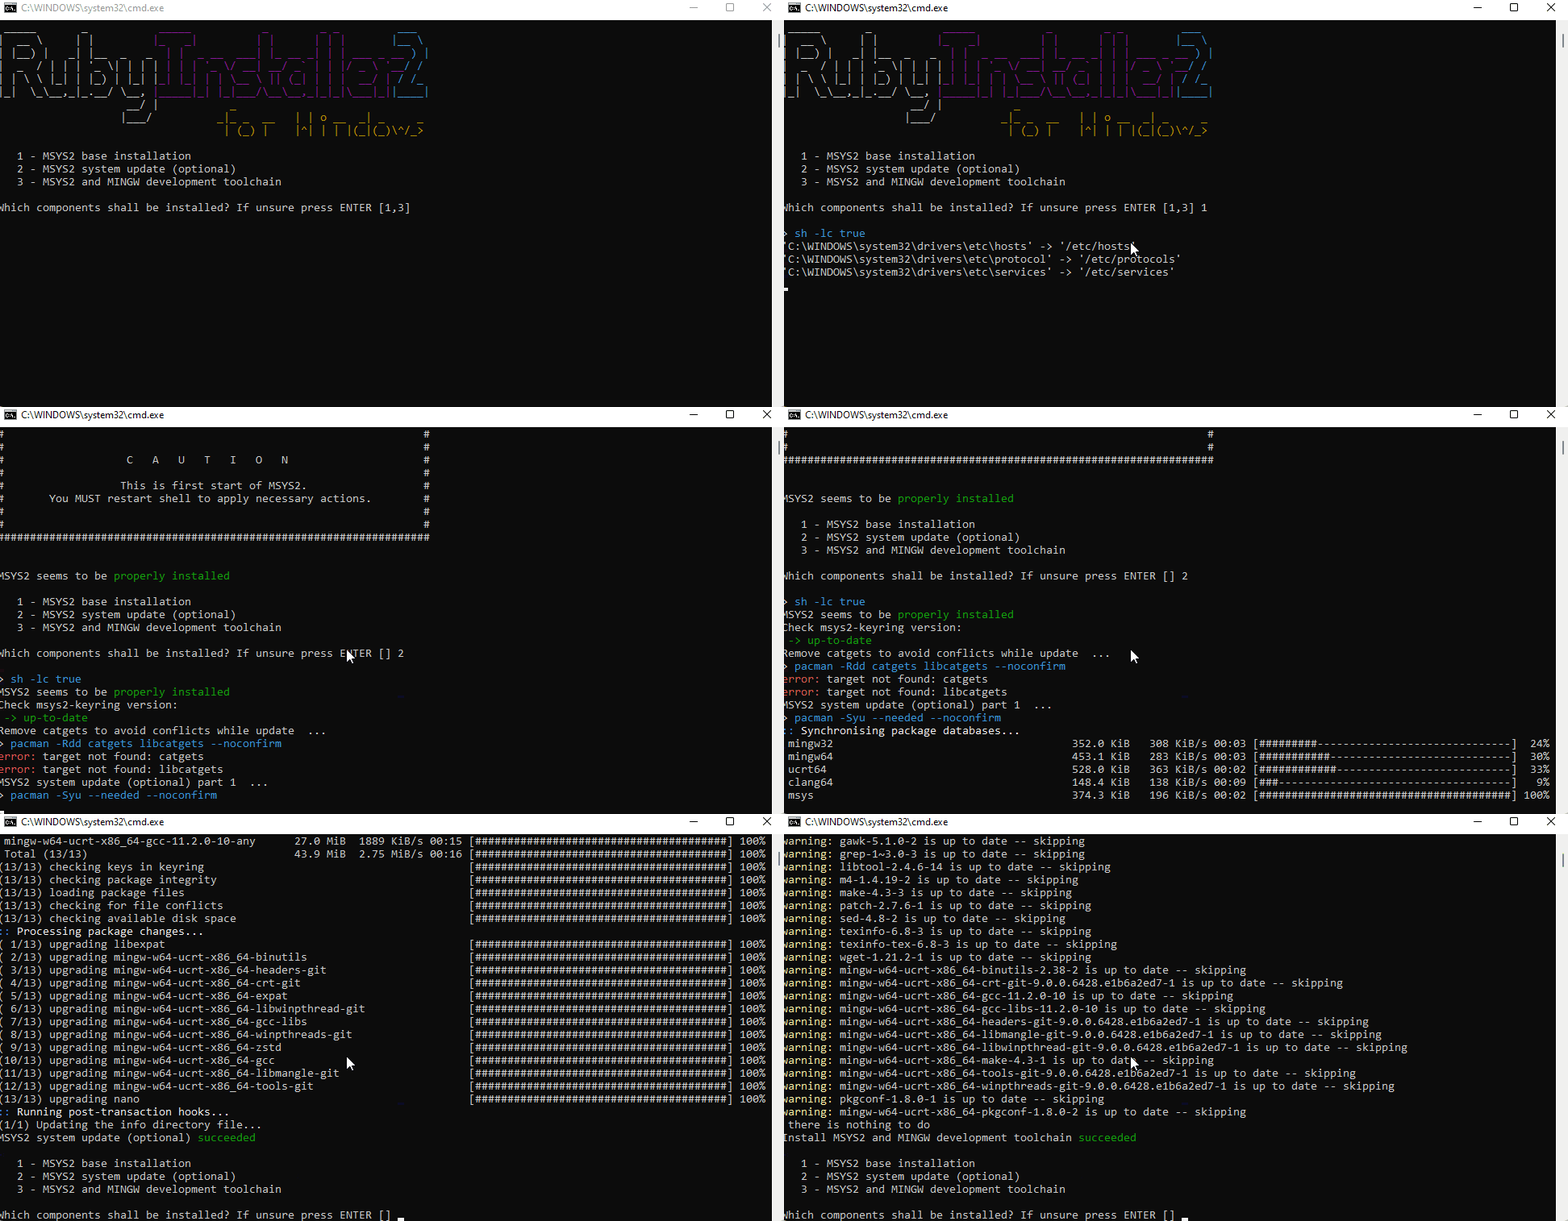
A terminal prompt will then appear. Run all 3 options after each other.
This can take a while to run.
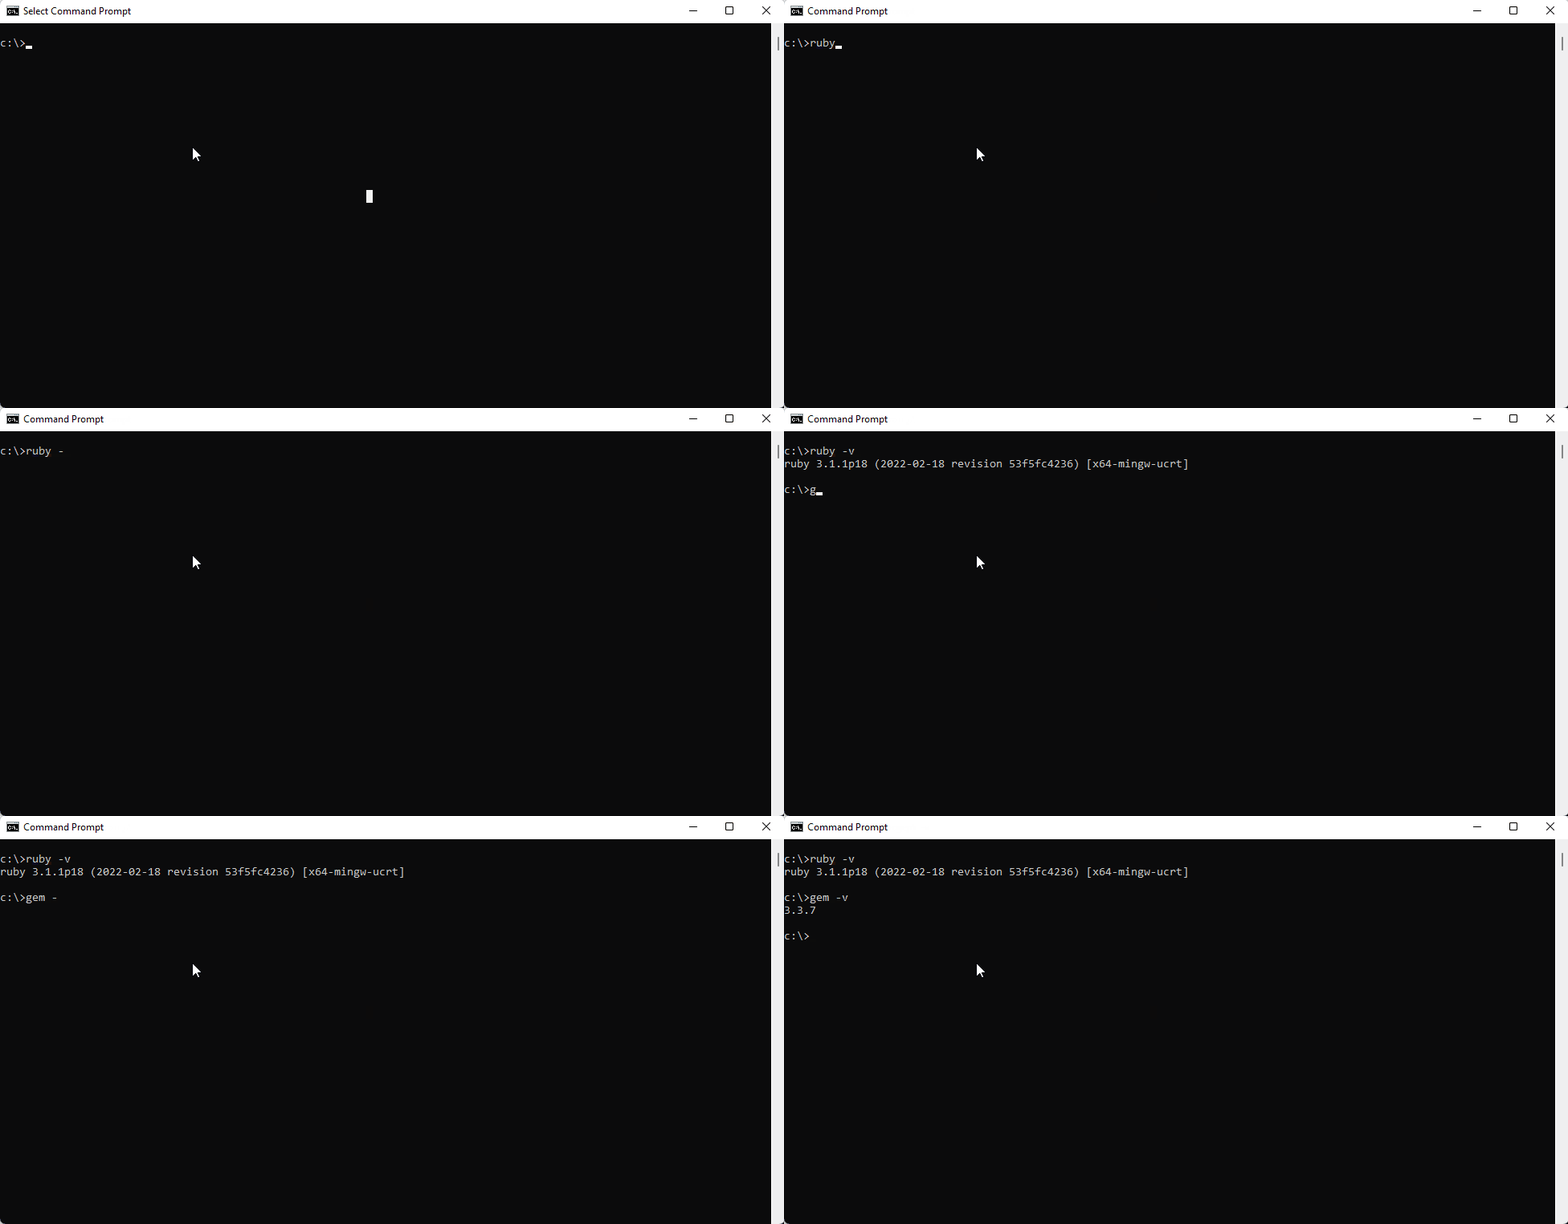
You can confirm the installation was successful by opening a new terminal window and typing the below commands to check the specific versions installed.
ruby -v

gem -v
Install Jekyll
Once Ruby is installed its super easy to install Jekyll.
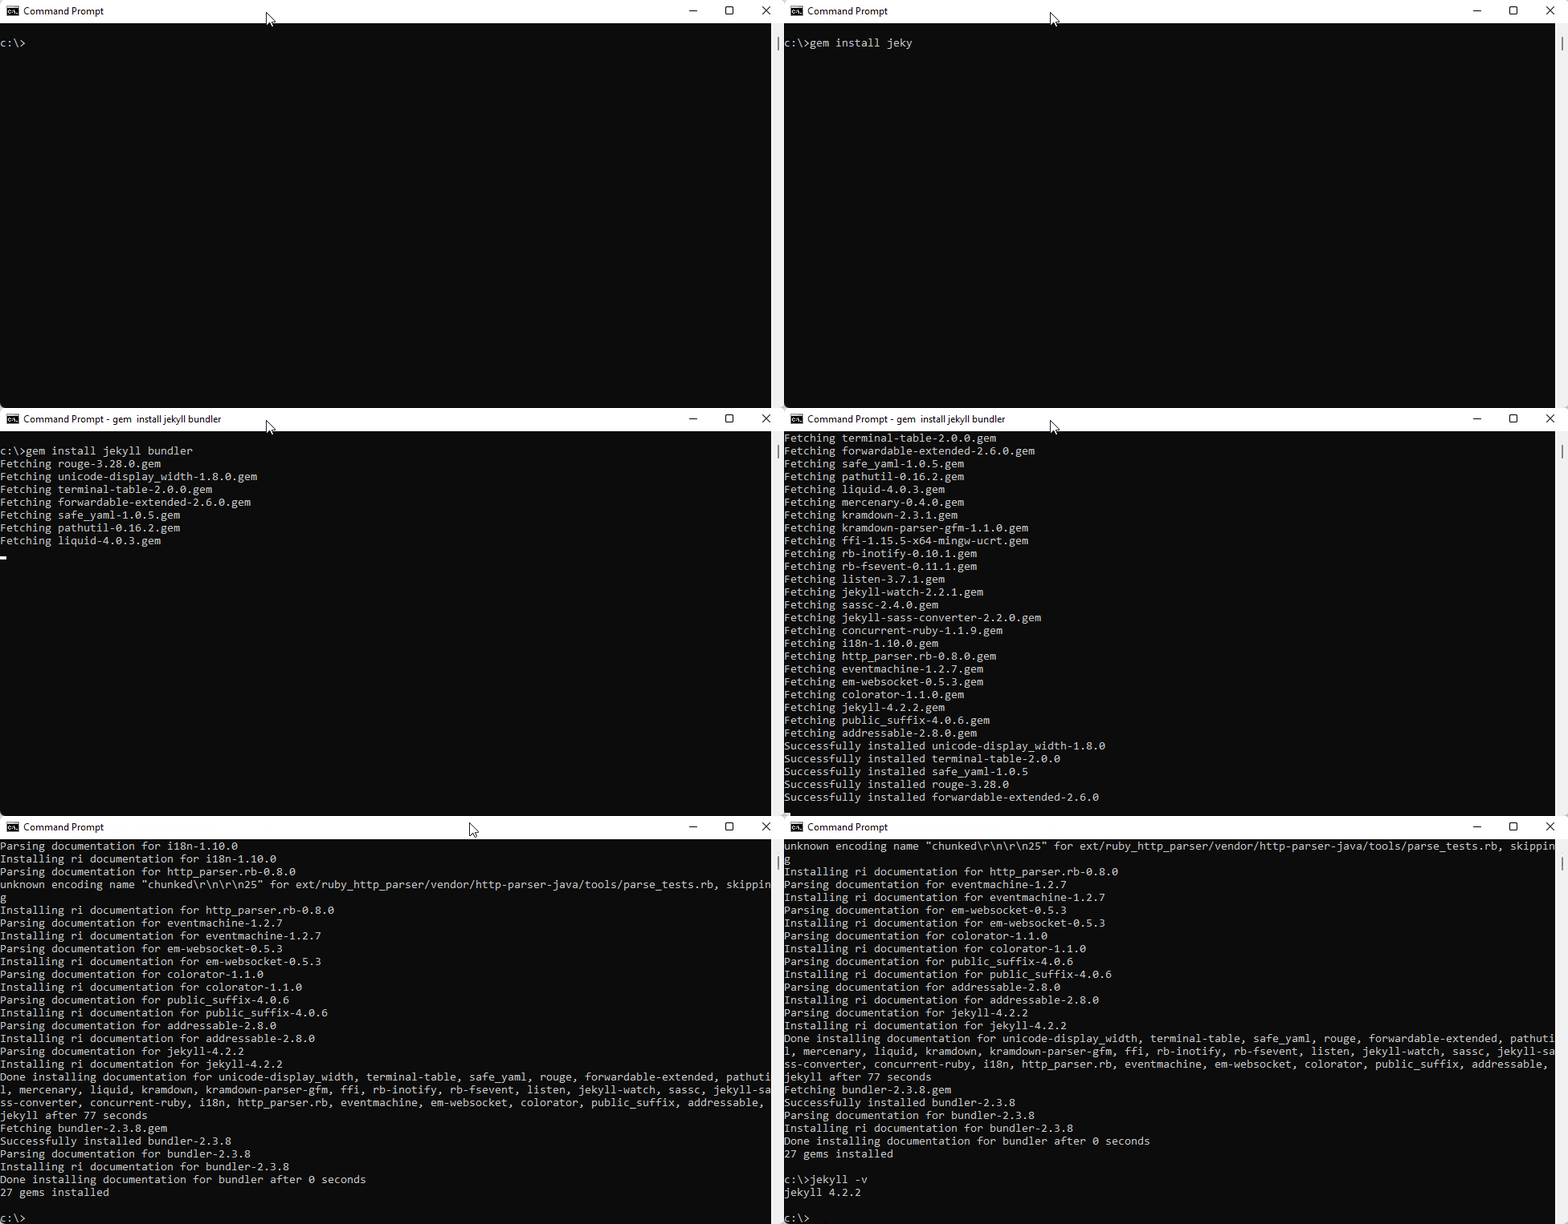
You can install Jekyll directly with Ruby gems by running the command gem install jekyll bundler.
Once the gem has installed you can confirm the installation was sucessful by running jekyll -v to confirm the version installed.
Creating your first Jekyll site.
It is best to use your IDE of choice for this, I’m using VS Code.
To get your first site up and running, change your terminal location to the folder where you want to create your site.
In the terminal run the command Jekyll new <site name here>.
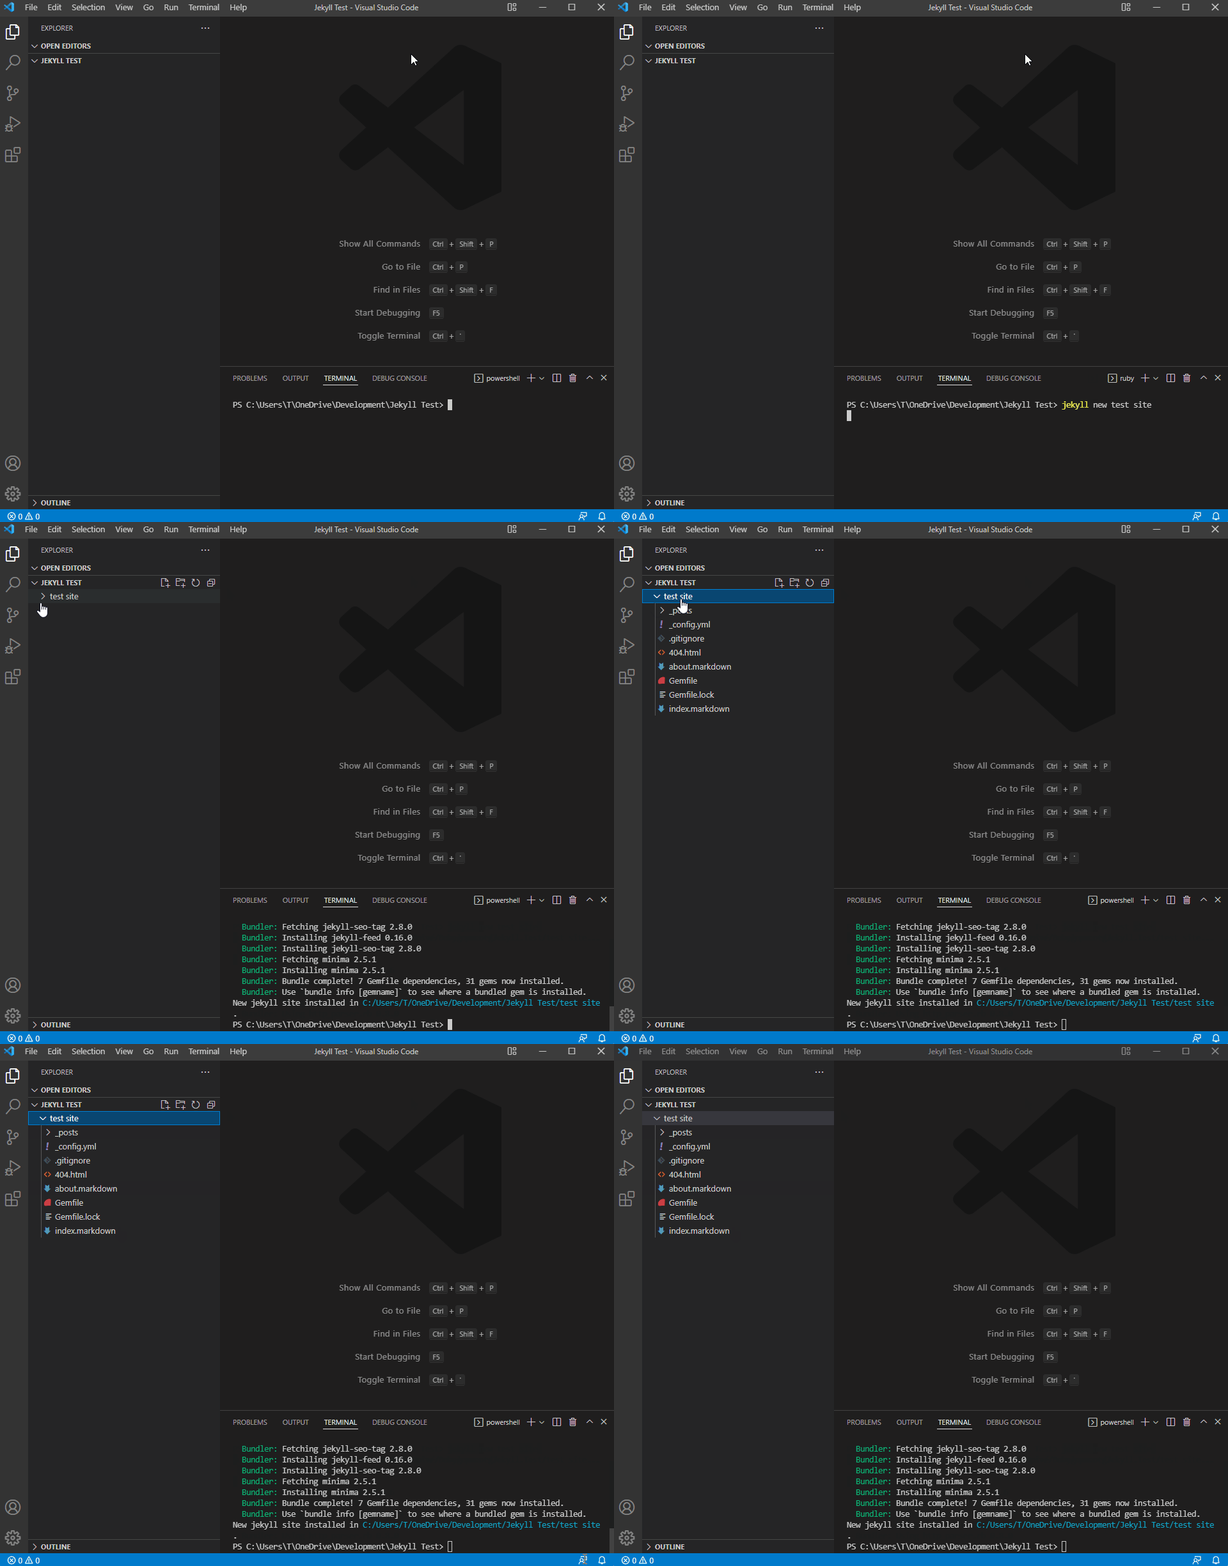
This will create the structure of your site, containing everything you need to get it up and running.
.
├── _posts
│   └── 2022-03-07-welcome-to-jekyll.markdown
├── .jekyll-cache
│   └── Jekyll
│       └── Cache
│           └── [...]
├── _config.yml
├── .gitignore
├── 404.html
├── about.markdown
├── Gemfile
├── Gemfile.lock
└──index.markdown
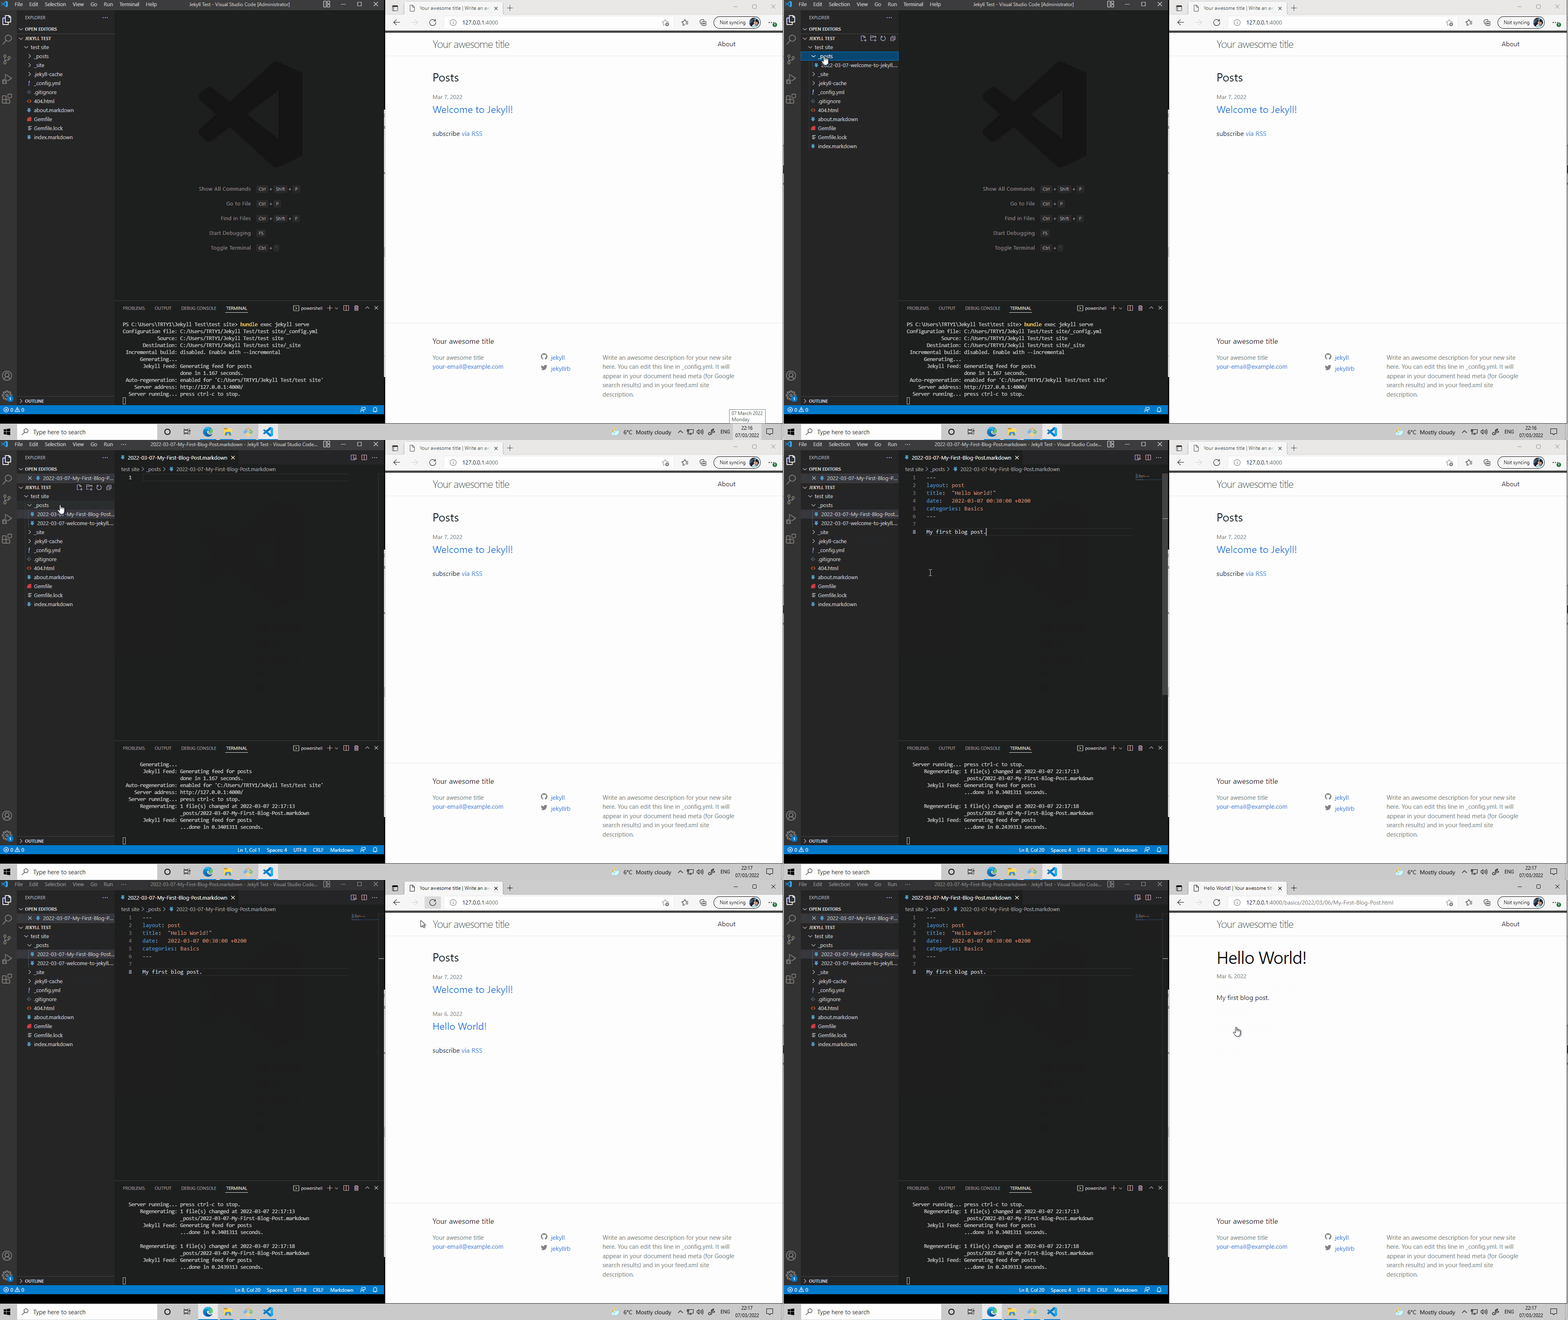
You can now build and serve the jekyll site on your local machine.
Change directory in your terminal to the newly created folder using (in my case) cd “test site” then run Bundle exec jekyll serve.
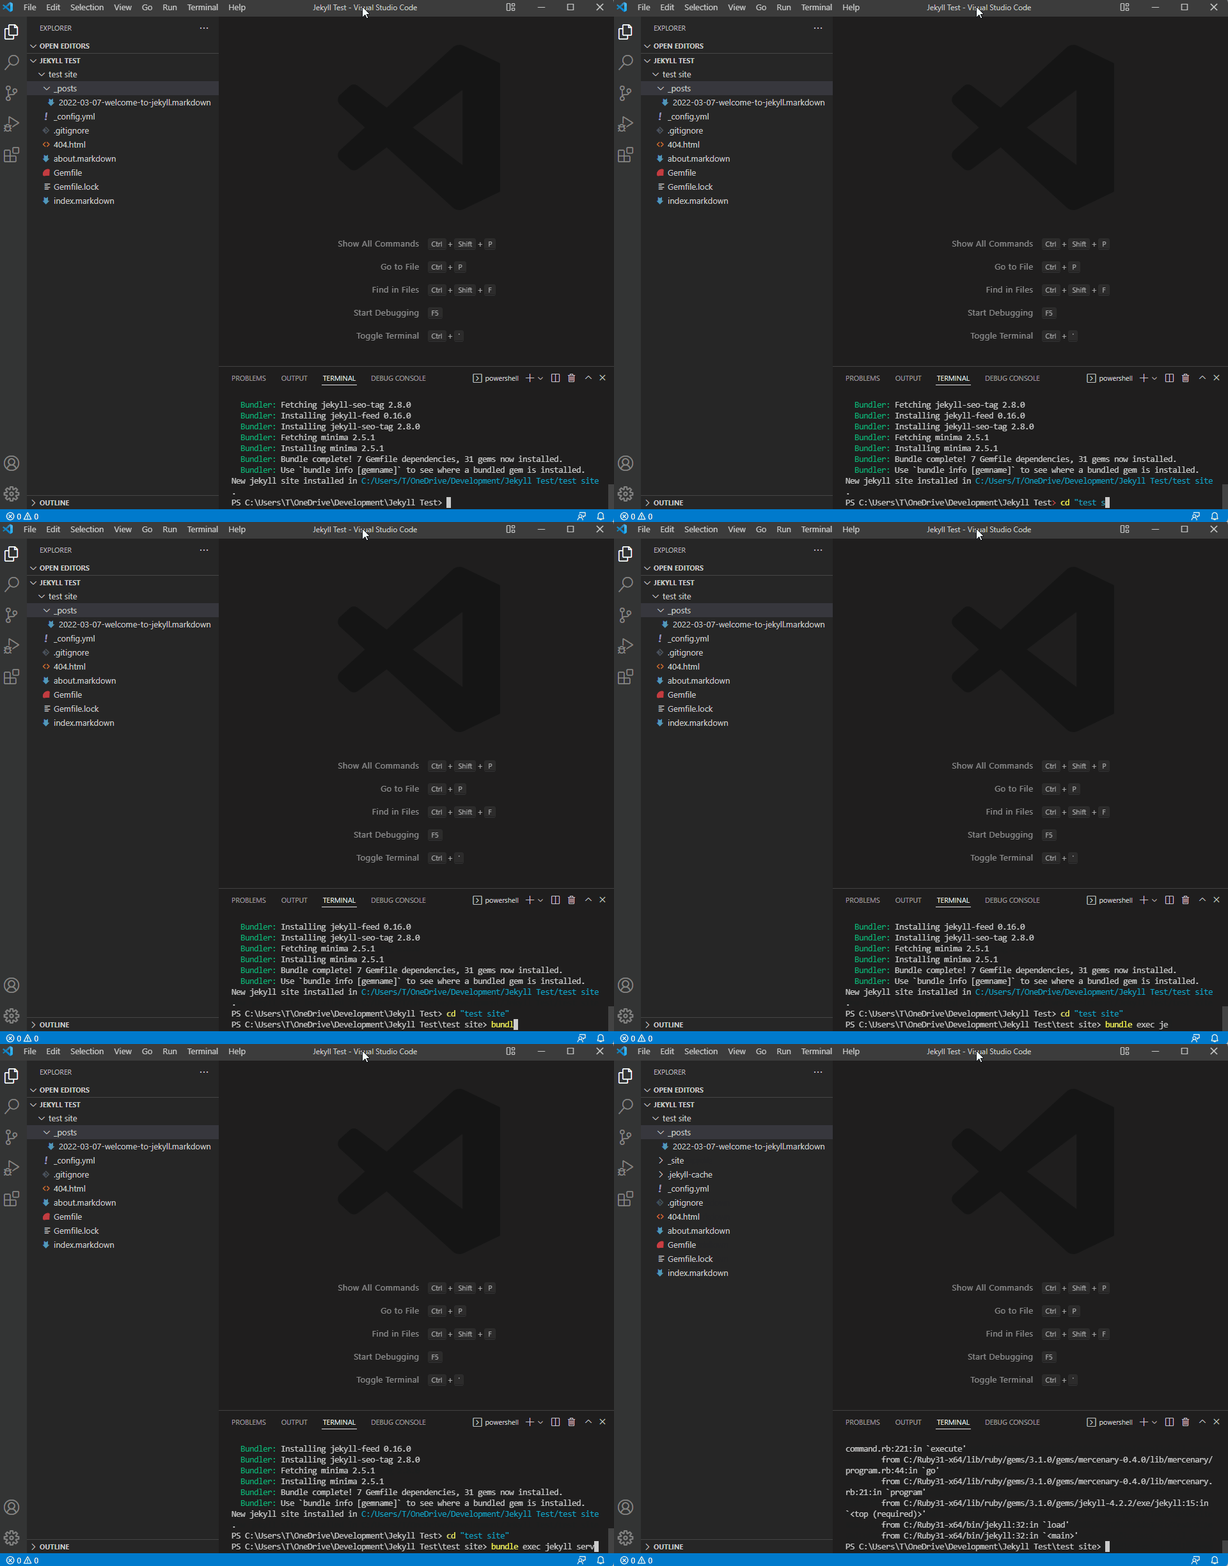
My first time doing this gave me this error message
C:/Ruby31-x64/lib/ruby/gems/3.1.0/gems/jekyll-4.2.2/lib/jekyll/commands/serve/servlet.rb:3:in `require’: cannot load such file – webrick (LoadError)
To fix this I needed to run the command bundle add webrick. Re-running Bundle exec jekyll serve now completes successfully giving you a local server address to view the served site.
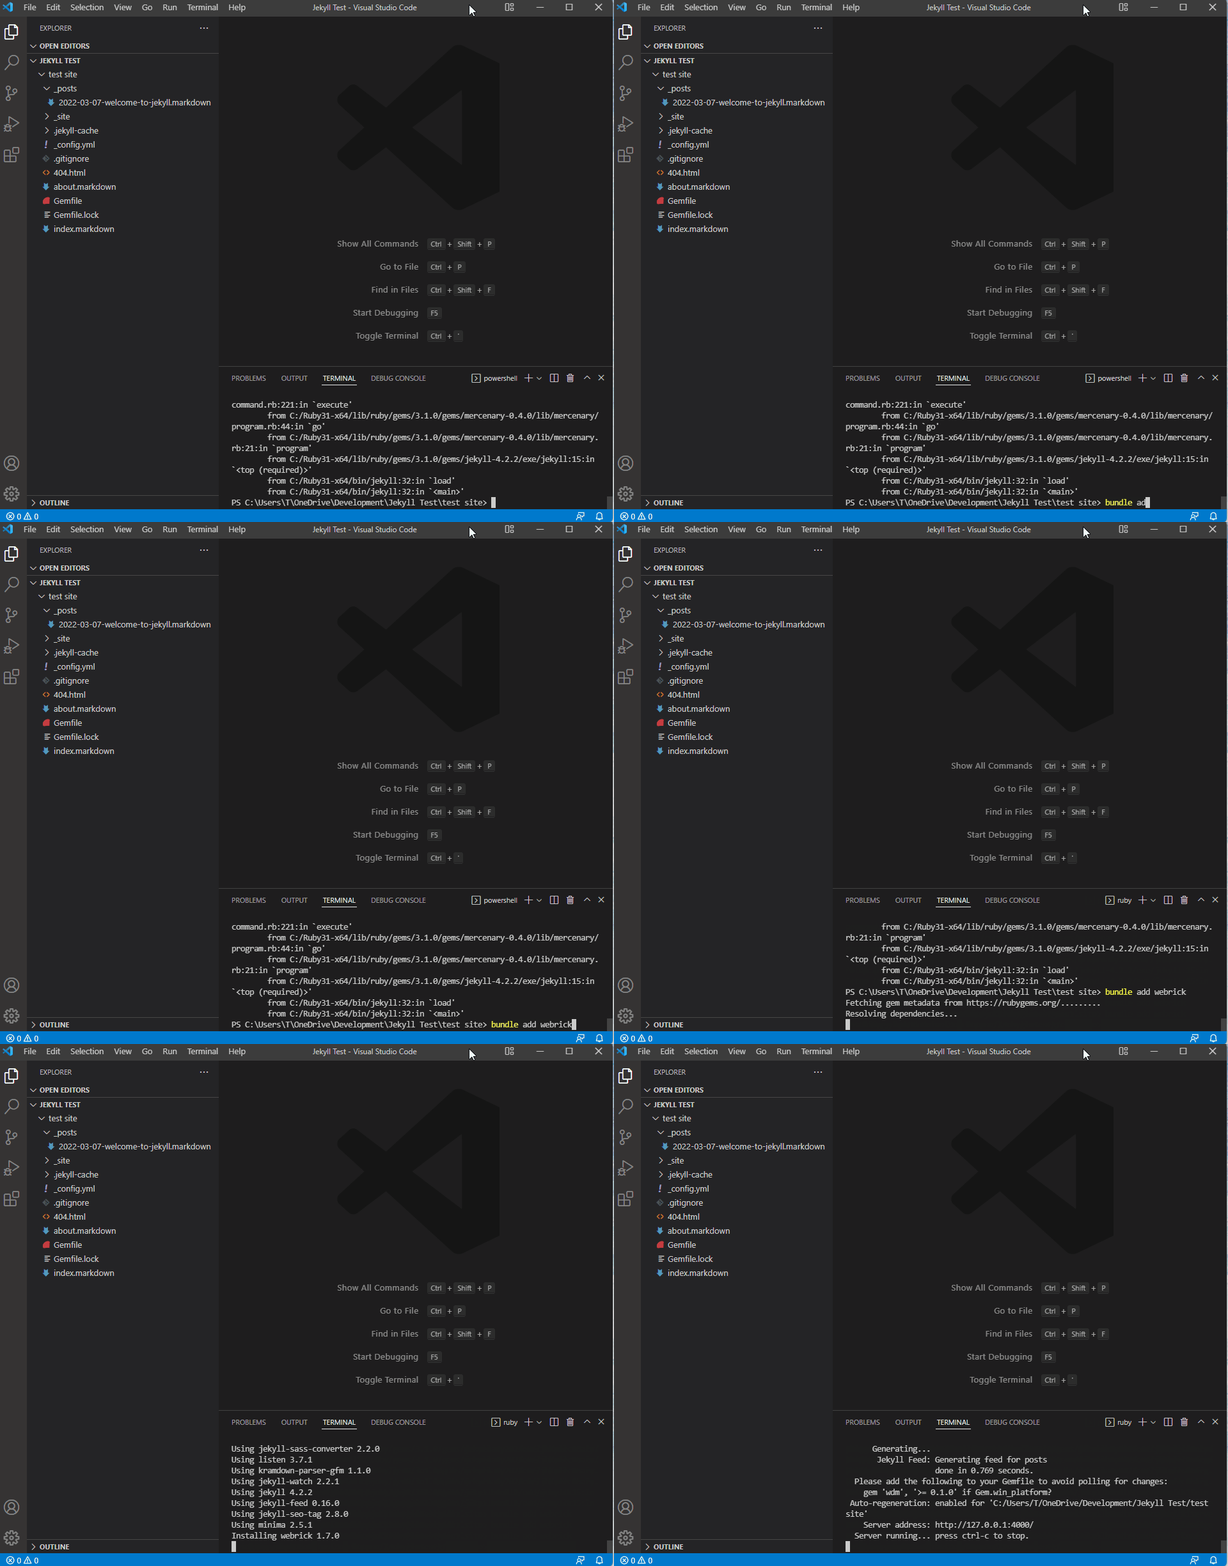
In your browser of choice, navigate to the URL provided in the terminal window (usually http://127.0.0.1:4000) and you will be presented with your newly created Jekyll site!
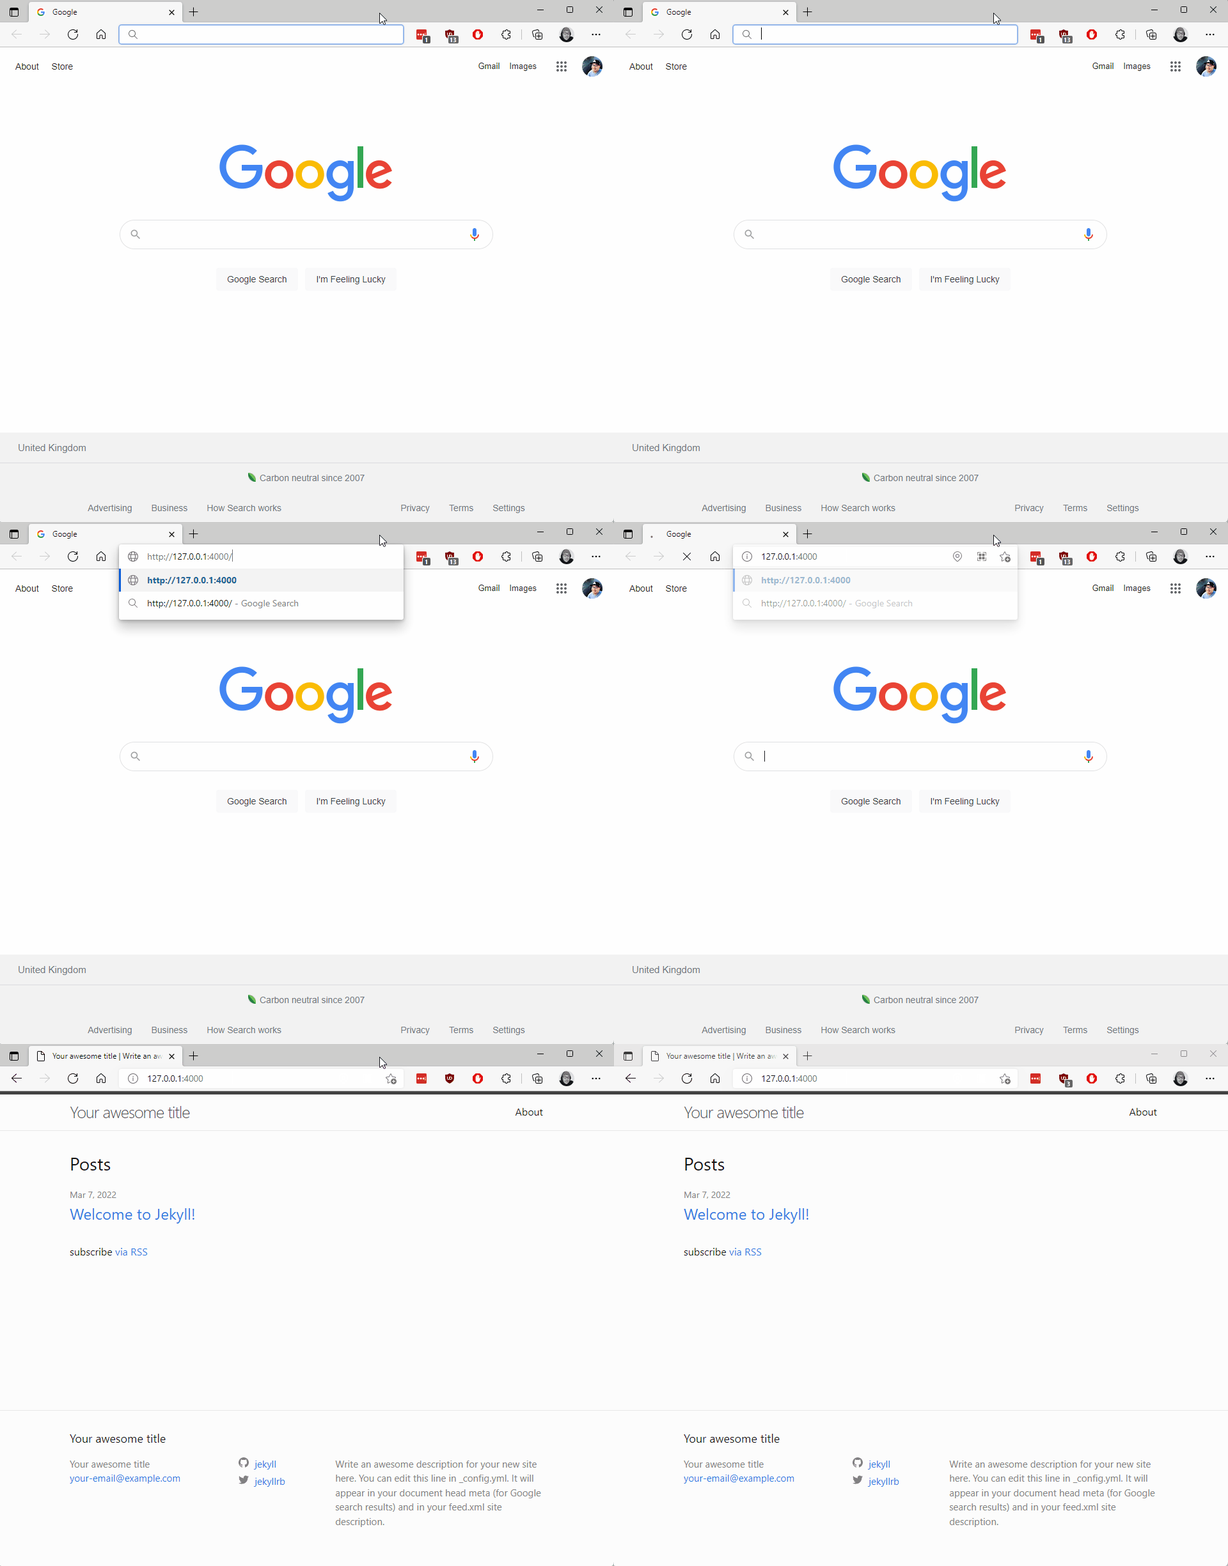
Congratulations! With just a few simple commands you have created your first Jekyll website! Jekyll is a static site generator that works with templates and markdown files. To customise the site we need to understand the file structure.
Jekyll Site Structure
.
├── _posts
│   └── 2022-03-07-welcome-to-jekyll.markdown
├── .jekyll-cache
│   └── Jekyll
│       └── Cache
│           └── [...]
├── _config.yml
├── .gitignore
├── 404.html
├── about.markdown
├── Gemfile
├── Gemfile.lock
└──index.markdown
_posts
This folder contains the markdown files that will make up your blog posts. The files need to conform to a standard naming convention of YEAR-MONTH-DAY-TITLE.markdown.
.jekyll-cache
Jekyll system folder that keeps a cache of previously generated pages for faster serving.
_config.yaml
Stores configuration data for the website. Data available to configure in here will depend on the theme used.
.gitignore
Git file used to specify while files git should ignore.
404.html
Default error page used when a page path cannot be resolved.
about.markdown
The about page content which is available in the navigation bar. The contents are transformed by Jekyll when the site it build/served.
Gemfile
Ruby configuration file that contains the gem dependencies required.
Gemfile.lock
The file in which the bundler records exact versions of gems that were installed.
Index.markdown
The home page content on the site. This page will be transformed by Jekyll when the site is built/served.
Creating a new post
To create a blog post you need to a create a new file in the _posts directory. The file needs to follow the naming convention YEAR-MONTH-DAY-TITLE.markdown.
If you open the default post you will see the file has a heading that contains something like this.
---
layout: post
title:  "Welcome to Jekyll!"
date:   2022-03-07 00:00:00 +0200
categories: jekyll update
---
This is the “front matter” of the page. Front matter contains predefined variables used to configure the page. The variables are self explanatory but i will delve deeper into them in a later post.
In this example I will create a file named 2022-03-07-My-First-Blog-Post.markdown.
At the top of the file enter the following front matter.
---
layout: post
title:  "Hello World!"
date:   2022-03-07 00:30:00 +0200
categories: Basics
---
Under the front matter you can write markdown formatted text as content for your post.
In this example i will write “My first blog post”. The complete file looks like this.
---
layout: post
title:  "Hello World!"
date:   2022-03-07 00:30:00 +0200
categories: Basics
---

My first blog post.
Save the file and refresh your webpage. The new post should now appear on your site.
Next
Expect more blog posts on themes, markdown, creating pages and hosting options soon.

