Getting started with Git and GitHub
What is git?
Git is a version control system for tracking changes in computer files. It also helps coordinate working on those files among multiple people.
Git is a distributed version control system.
What is a distributed version control system?
Git doesn’t rely on a central server to store all the versions of a project’s files. Instead every users “clones” a copy of a repository (a collection of files), then has the entire history available to them.
What is version tracking?
Git keeps track of your files and effectively gives you the options of reverting the contents of the files back to a specific point in time.
An example of this is you are working on some code which makes the program become unstable, and you have no idea what is causing this. You can now revert the code back to when it was stable by going back to an earlier version of the file you’ve been editing. This can be very good for debugging or to simply see the changes made to your files over time.
Synchronise work amongst multiple people
Git allow you to synchronise files between multiple people meaning you can all work on the same project at the same time, while ensuring everyone is on the latest version of the files. Git takes all changes made independently and merges them into a single “master” repository.
Git Workflow
What is a repository?
A repository is just a collection of files. It is a container for a project that is tracked by Git.
There are 2 main types of Git repositories:
- Local Repository - a repository that is stored locally on your own computer which you use to work on your version of the files.
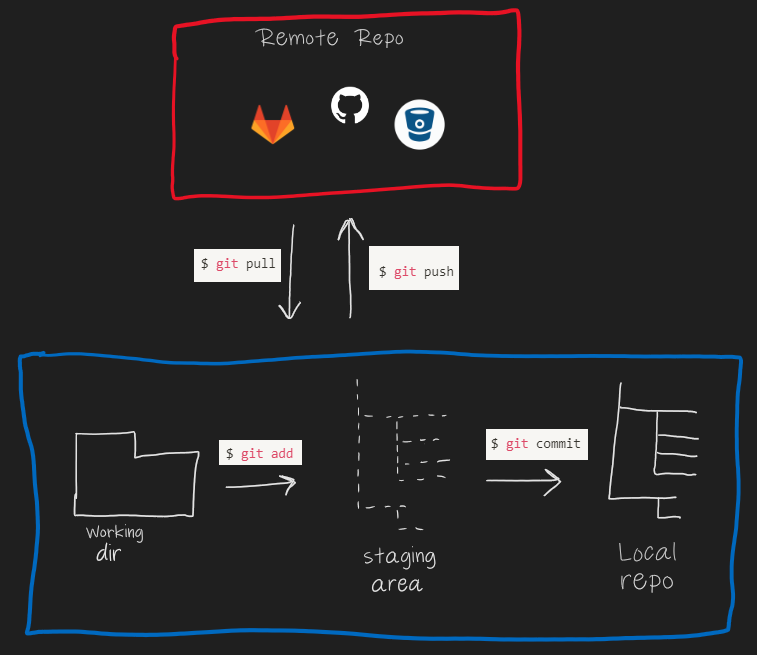
- Remote repository - a repository stored on a remote server or internet service such as GitHub. This is usually considered the “master” copy which all local copies are “pulled” from while working on the files, then “pushed” to when finished.
What is the basic workflow in git?

A typical Git workflow consists of 3 stages. You have a working directory which is the root directory of the code you are working on. Once you’ve made the required changes to your files you will “add” your files to a staging area, then “commit” them to the local repository.
Why stage your files before you commit them? Why not just take your files direct from your working directory into the local repo? Well I’ve not been able to find a good answer or a good use case to this yet so if you have one please let me know! For the time being just take it for granted that its a 2 stage process to commit you files to Git. You add them to the staging area and then commit to the repository.
A good discussion on why you would want to stage before committing can be found here on Stack Overflow.
Basic Git commands
$ git init
This command is used to create a new repository so you can start tracking your project with git.
$ git add
This command adds the edited or untracked files to the staging area. This means your changes are now indexed, tracked in Git and ready to be added back to the local repository.
$ git status
This command lets you confirm that the files have been added to the staging area successfully.
$ git commit
This command commits your changes from the staging area, back to the local repository.
$ git remote
This command lets your create, edit, view, and delete connections to remote repositories. Think of it as setting a bookmark to your remote repo before using commands such as push, clone, pull, ect.
$ git push
This command pushes your local repository to the remote repository.
$ git clone
This command lets you clone an existing repository. Typically used to clone a remote repository onto your local machine ready to use as your local repository to edit files.
$ git pull
This command will pull the latest version of the repo from the remote repo to your local repo, and working dirctory, ensuring you are working on the latest version of the files.
$ git checkout
Creates your own “branch” to work on changes to the files independently of the master branch.
$ git fetch and git merge
The git fetch command is used to get files from the remote repo to the local repo, but not into the working directory. The git merge command is used to get file form the local repo into the working directory. The git pull command is the equivalent of running both of these commands.
Using Git and GitHub for a new project.
What is GitHub?
GitHub is a service that will host your Git repositories. This makes GitHub your remote repository in the workflow mentioned above. Your GitHub repository will consist of all your branches, workflow history (commit, merge, etc), plus any licencing/readme/rake/gem files, etc.
Using Git and GitHub together ensures all modification are centrally tracked, available to everyone, and in the case of a issue, can easily be rolled back to a previous state.
Setting up Git.
You can download Git (for windows) here.
Next, next, next the install.
Tell Git who you are.
Set up Git with your username and email address. This will be used to identify who has made each git commit command. You can open any terminal application you use to enter Git commands. (ideally use Git Bash terminal which was installed with Git).
$ git config --global user.name "YOUR_USERNAME"

$ git config --global user.email "email@email.com"

$ git config --global --list # To check the info you just provided
Create an empty repo on GitHub.
I’m assuming you have a GitHub account already and you’re signed in (if not you can join online here).
You can click this link to be taken straight to the “create a new repository page”. In this example I’m creating a repo named “TestGit”.

You will then be presented with this information. You will need this later to push your local repository to GitHub.


Create a local set of files you want to track in git.
This would normally be a local project you’ve been working on that you want to track in a repository.
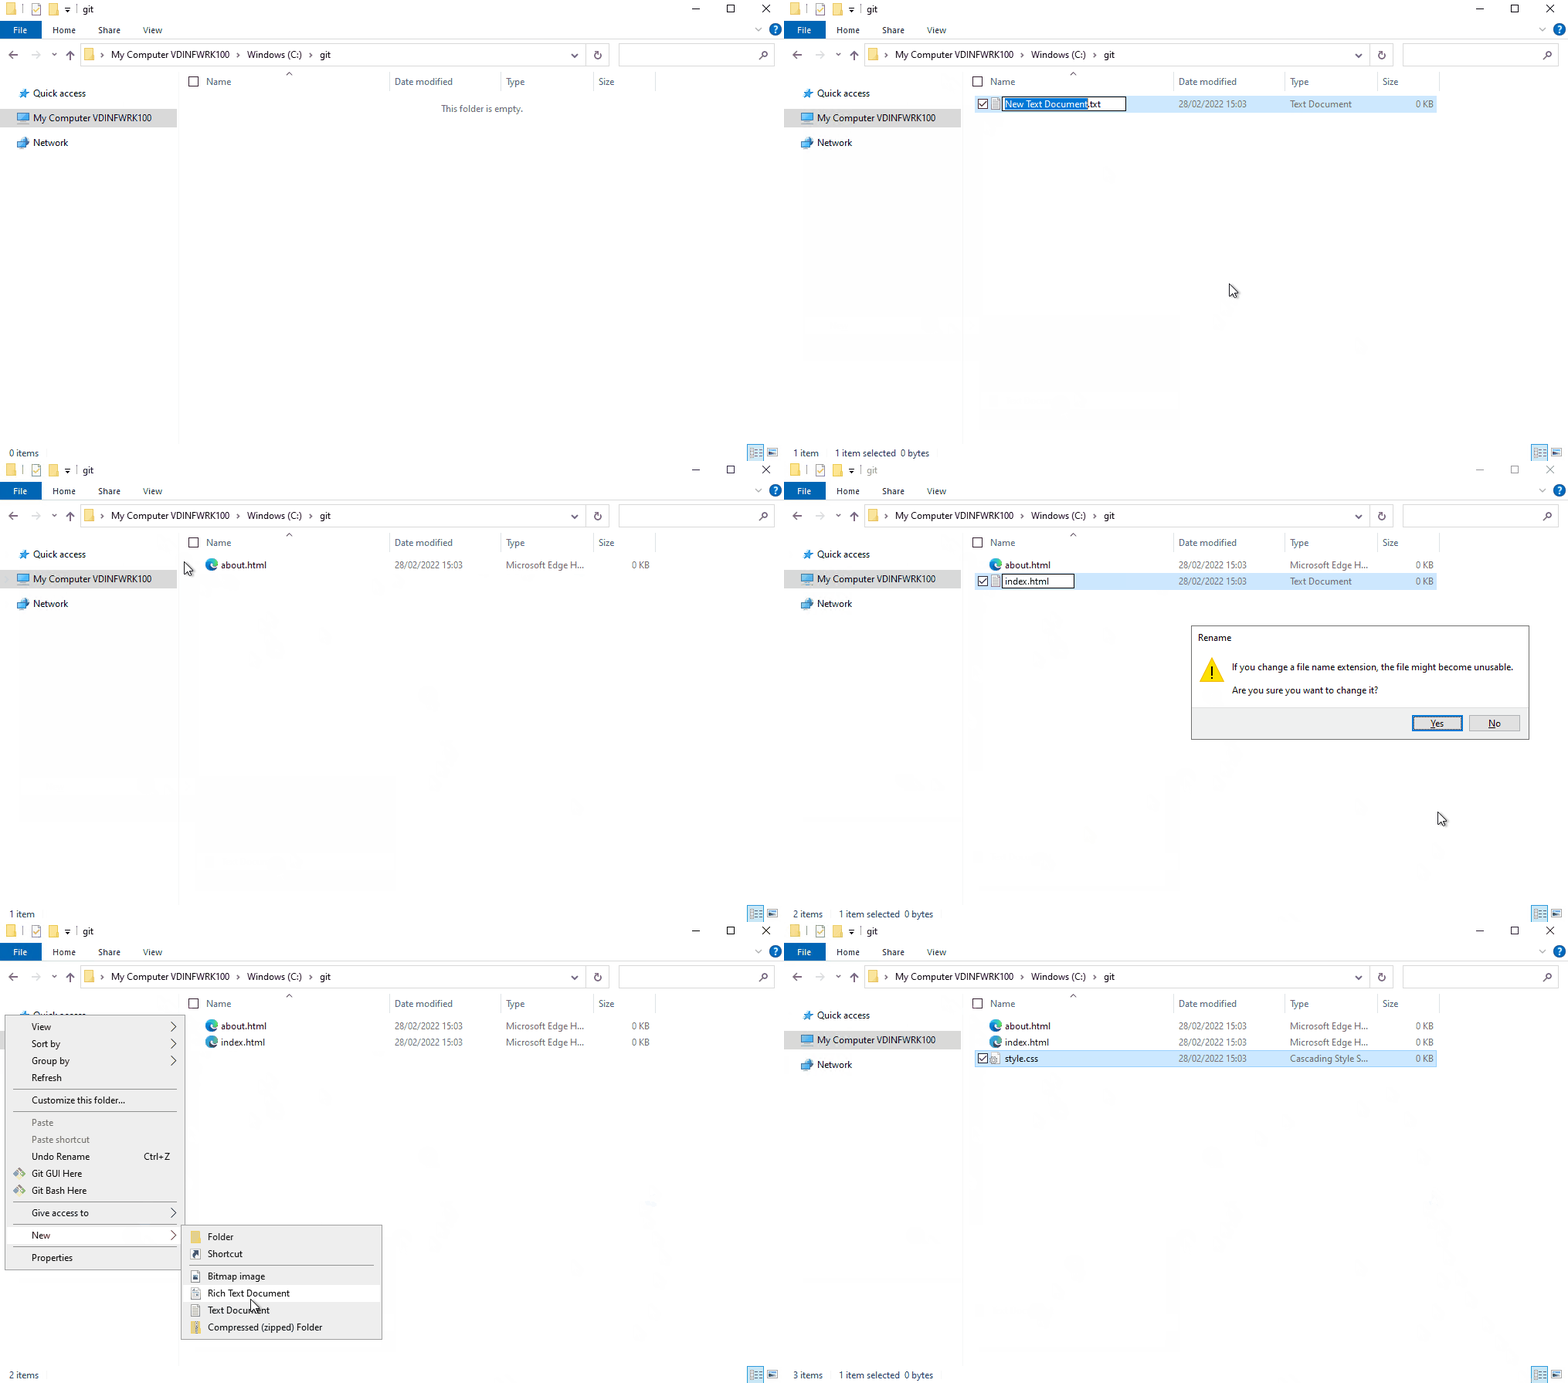
For the sake of this example I’m going to create a directory with some empty .html and .css files in it.

Make sure your terminal is in the directory you want to track.
cd c:\TestGit
Initialize Git.
Create a readme markdown file
$ touch README.md # Creates a readme file for the repository
Create a new git repository within your project folder using the git init command.
$ git init # Initiates an empty git repository

After running this command, if you enable the “show hidden items” option in windows explorer you will see the .git hidden folder within the file structure.

Add files to the staging area.
Use the git add command to add the files in your working directory to the staging area ready to commit.
$ git add .
# Adds all the files in the local repository and stages them for commit

$ git add README.md
# To add a specific file
Check status of staged files.
The command git status shows a list of all new or modified files to be committed.
$ git status # Lists all new or modified files to be committed.

Commit changes to local repository.
We’re now ready to commit the changes to the local repository. Use the git commit command.
$ git commit -m "inital commit"

Re-running the git status command at this point now shows nothing to commit

Push changes to GitHub remote repository.
The last step is to push your local repo to GitHub.
We need to run the git remote command to set up our connection to GitHub. Use the URL given to you by GitHub when creating the empty repository.
$ git remote add origin https://github.com/tristantyson/TestGit.git
You can now push your local repo to the GitHub using git push.
$ git push origin master

If this is your first time pushing to GitHub you will be prompted authenticate against your GitHub account.

For the purpose of this basic demo I chose “sign in with your browser” which was already signed in and authorised.

The git push command now completes successfully.

Going into your repository on GitHub itself, will now show the committed files.

That’s it! Your local repository is now pushed into GitHub!
Common workflow.
The most common flow of commands to push content to GitHub.
$ git add .
$ git status # Lists all new or modified files to be committed
$ git commit -m "Comment changes here"
$ git push -u origin master
Next.
The next Git based blog will expand on some features including, cloning, branching, uncommiting, differences, and commit history.
