
How to create a Windows 11 virtual machine using VMware Workstation 16
Just a quick blog post to show you how to create a virtual machine which is encrypted and has a TPM chip configured, ready for use with Windows 11.
Overview
If you want to skip the guide, the basic requirements are:
- 4GB RAM.
- 64GB hard disk.
- Encrypt the virtual machine.
- Add a Trusted Platform Module.
Download Windows 11 ISO
The first thing you need before creating a virtual machine will be a Windows 11 ISO file. The best place to get this from is the Microsoft Volume Licensing Service Center, provided you have an account.
If you do not have access to VLSC, then you can download the ISO from https://www.microsoft.com/software-download/windows11.

Create the virtual machine
Now you have your ISO file, you are ready to create the virtual machine.
- Open VMware Workstation and go to File then New Virtual Machine. Select a Typical configuration, then Next.
- Select Installer disc image file (iso) then navigate to your downloaded Windows 11 ISO, select Next when finished.
Currently, VMware Workstation won’t detect the operating system on the ISO.
- Select Microsoft Windows as the guest operating system, then select Windows 10 and later x64 for the version.
- Name your virtual machine and ensure its saved to the correct location, select Next.
- Ensure the maximum disk size is set to 64GB as this is the minimum requirement set by Microsoft. Select Next to continue.
- On the Ready to Create Virtual Machine screen, select Customise Hardware.
Configure the virtual machine for Windows 11
You can find the official Windows 11 requirements here: https://docs.microsoft.com/en-us/windows/whats-new/windows-11-requirements.
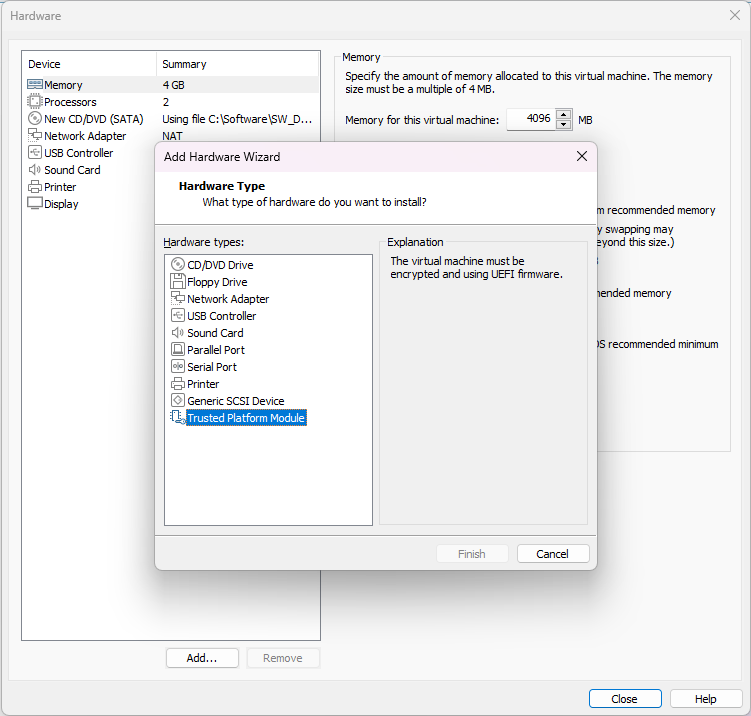
To meet the requirements, we first need to increase the default memory size to 4GB or greater.
We also need to add a Trusted Platform Module to our virtual machine, but you’ll notice if we try to add one now, the option is greyed out.
In order to add a TPM chip, we must first encrypt the virtual machine. To do this, close the customise hardware window and select Finish. Now right click on the newly created virtual machine and select Settings.
On the settings page, select the Options tab at the top, then Access Control, then Encrypt. You will now be prompted to enter a password. Press Encrypt once you’ve entered and confirmed the password.
Be aware that once the machine is encrypted, you will be prompted to to enter the password every time you try to launch it going forward.
Now select the Hardware tab at the top, then Add, Trusted Platform Module, Finish, then finally Ok on the virtual machine settings page.

Conclusion
Your virtual machine is now configured to meet the minimum specification for Windows 11. Boot the virtual machine and you will now be able to install Windows 11 successfully.
